Table of Contents
A digital frame with the Raspberry Pi
Digital frames have become common gadgets, easily available in electronics stores or online. Unfortunately they came with proprietary software, and limited flexibility. So my choice was to purchase a nice 24 inches monitor and boundle it with a Raspberry Pi 2, fitted with a 64 Gb SD card.
For the software part I opted for a web based user interface written in PHP, which allow to easily browse all the pictures organized in directories. Each directory containing images have a playlist.m3u file, which lists the files to be shown in the slideshow. The playlist file contains also geometry information to re-frame the pictures to fit the screen as requested. So I can show photos taken in 4:3 ratio on the 16:9 screen, without the black borders. All the magic of the slideshow is accomplished by the photo-reframe-slideshow software.
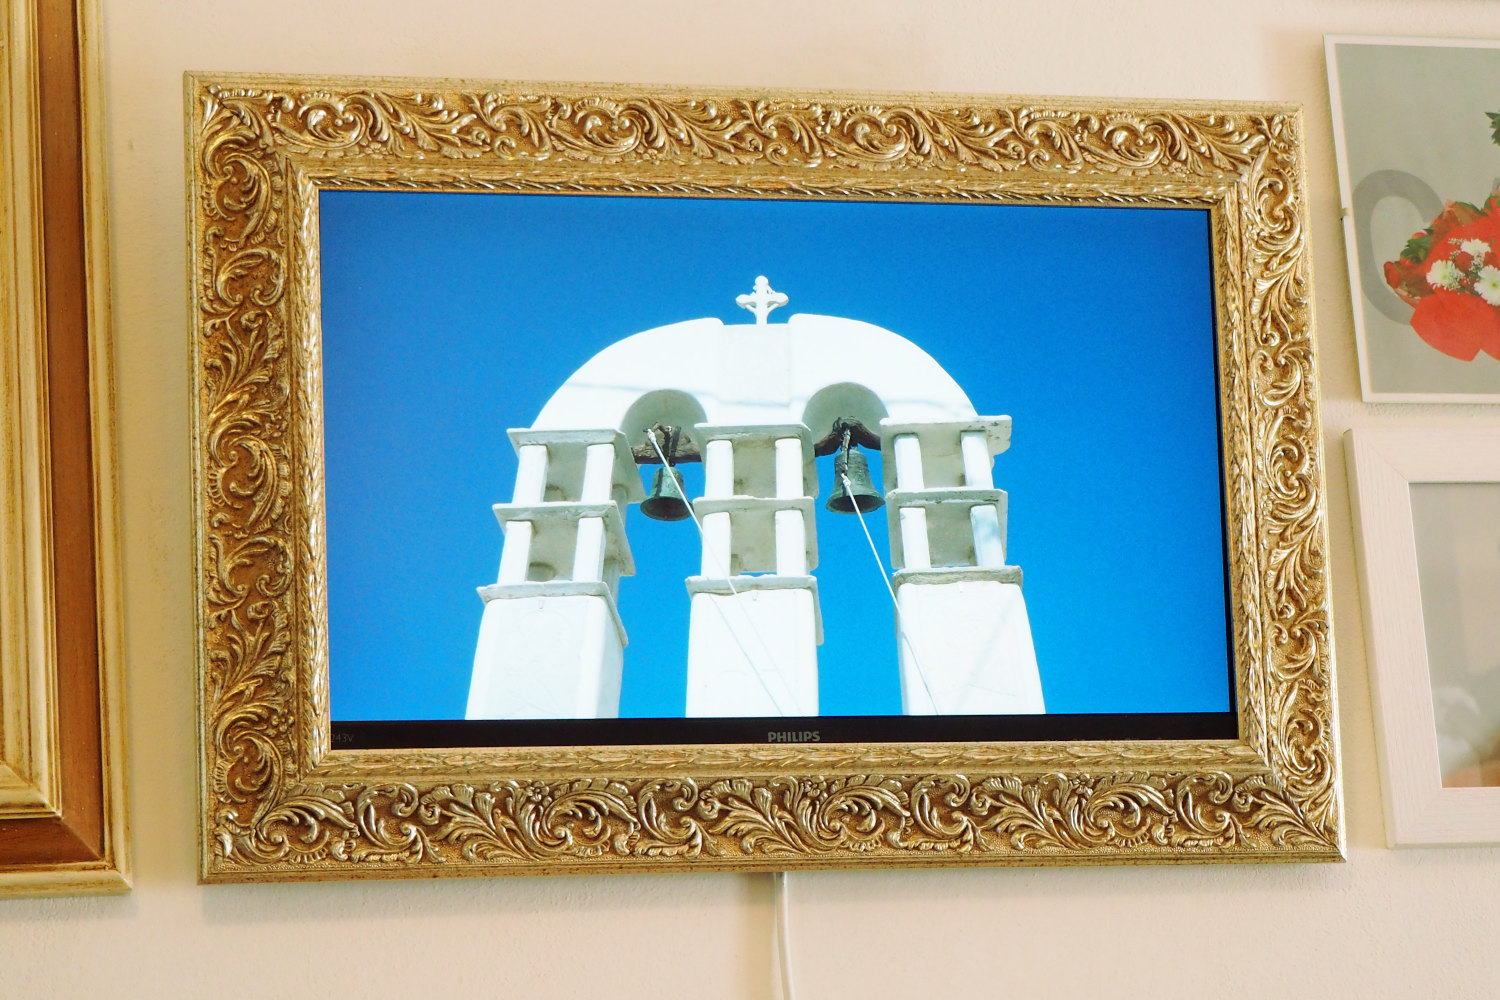
In the picture above you can see the final assembly. The monitor is a Philips 243V7QJABF, 24 inches LED IPS capable of 1920×1080 resolution, the software runs on the Raspberry Pi 2 Model B Rev 1.1, using a 64 Gb SD card.
Building the frame
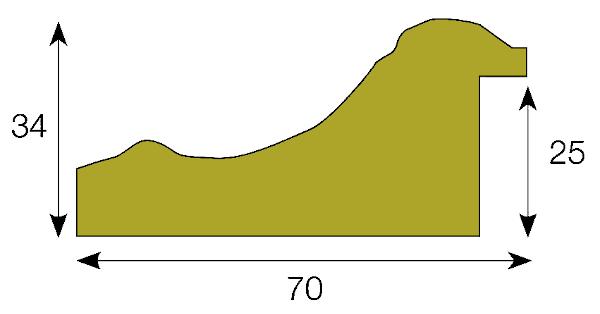
The first step was to order the hand-made wood frame from a craftsman. The profile size is shown in the picture, the inner space to accommodate the monitor is 54.0 x 32.5 cm.
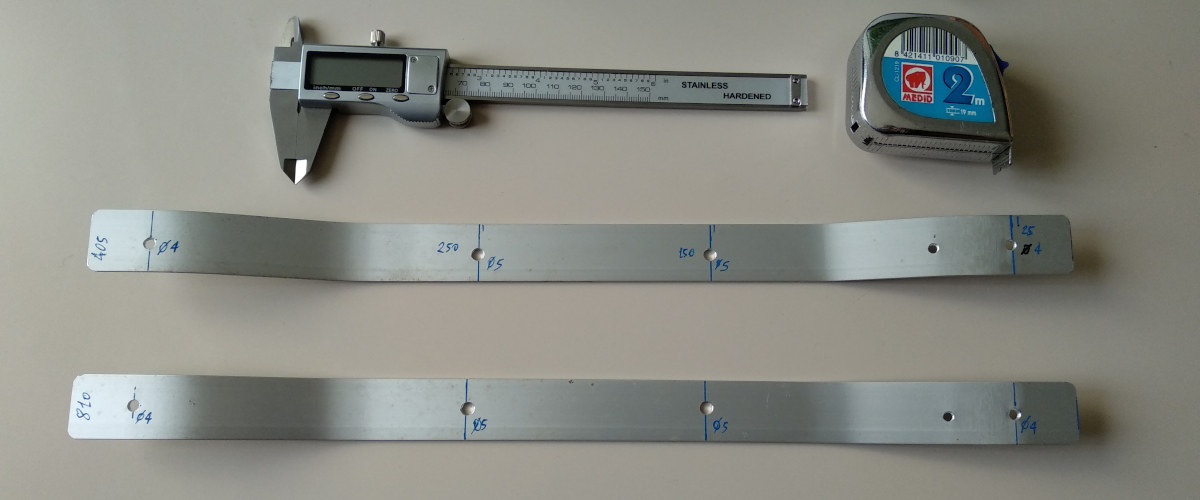
I made two aluminum brackets suitably drilled and bent to connect the frame and the monitor, using the Vesa mount holes.
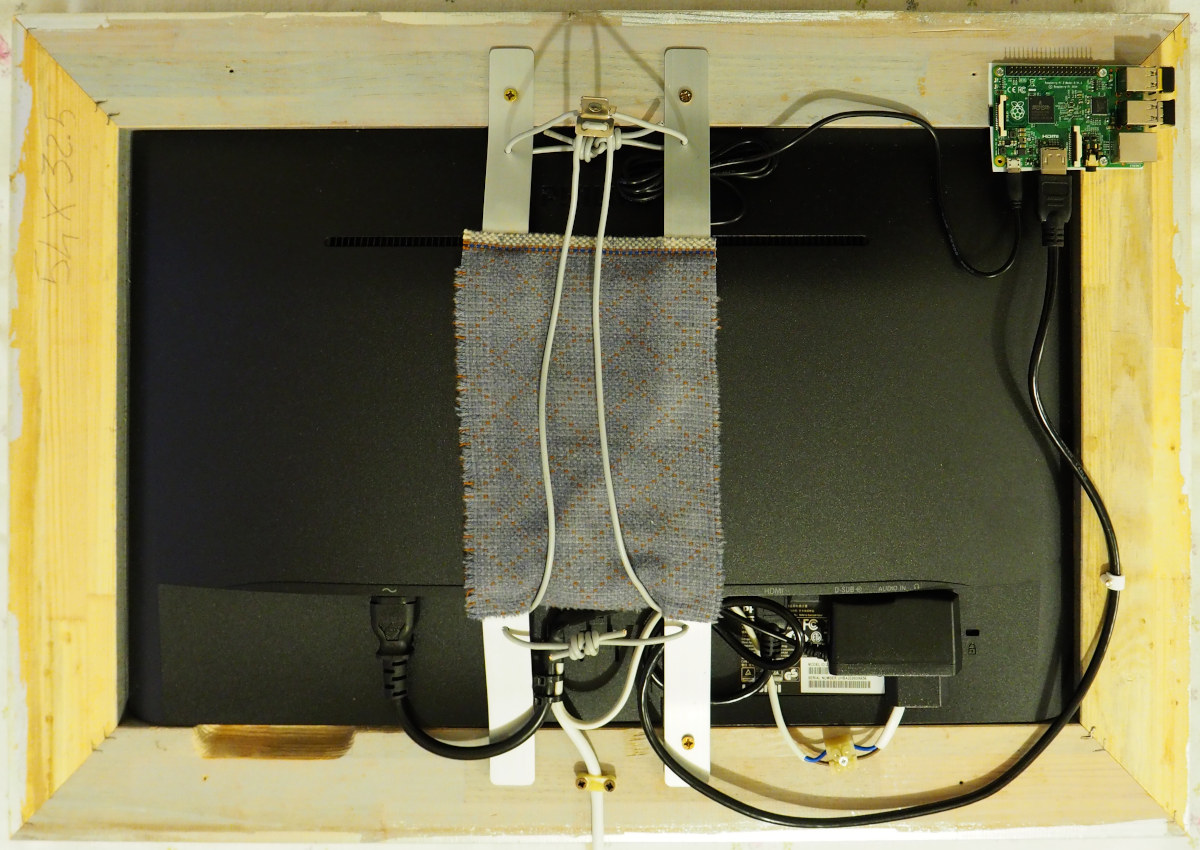
I used some electrical wiring, clamps and heat-shrink tubing to provide the power. The Raspberry Pi power supply is glued to the monitor back with a bit of silicone adhesive. A few pieces of felt and a cloth were used as padding to prevent the metal from dirtying the wall. Finally a bit of electrical cable was used to make the hanging hook, built so that the angle of the frame could be adjusted downwards.
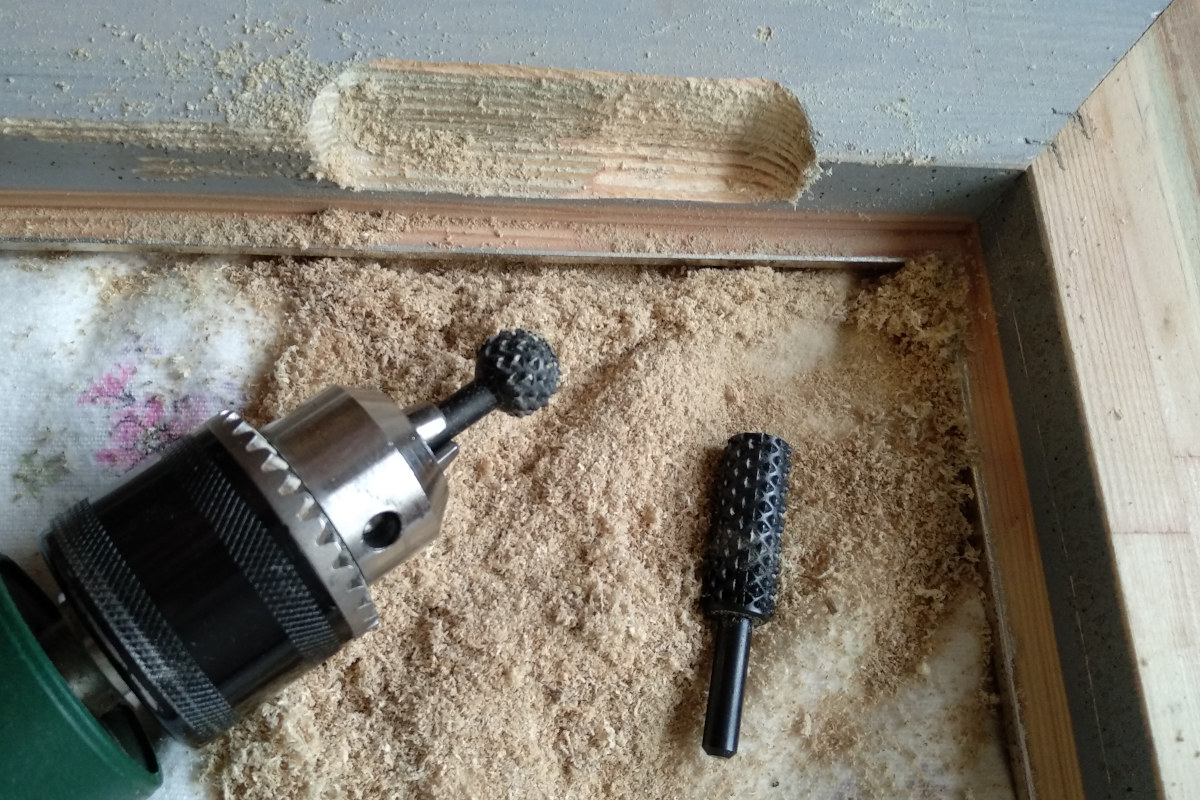
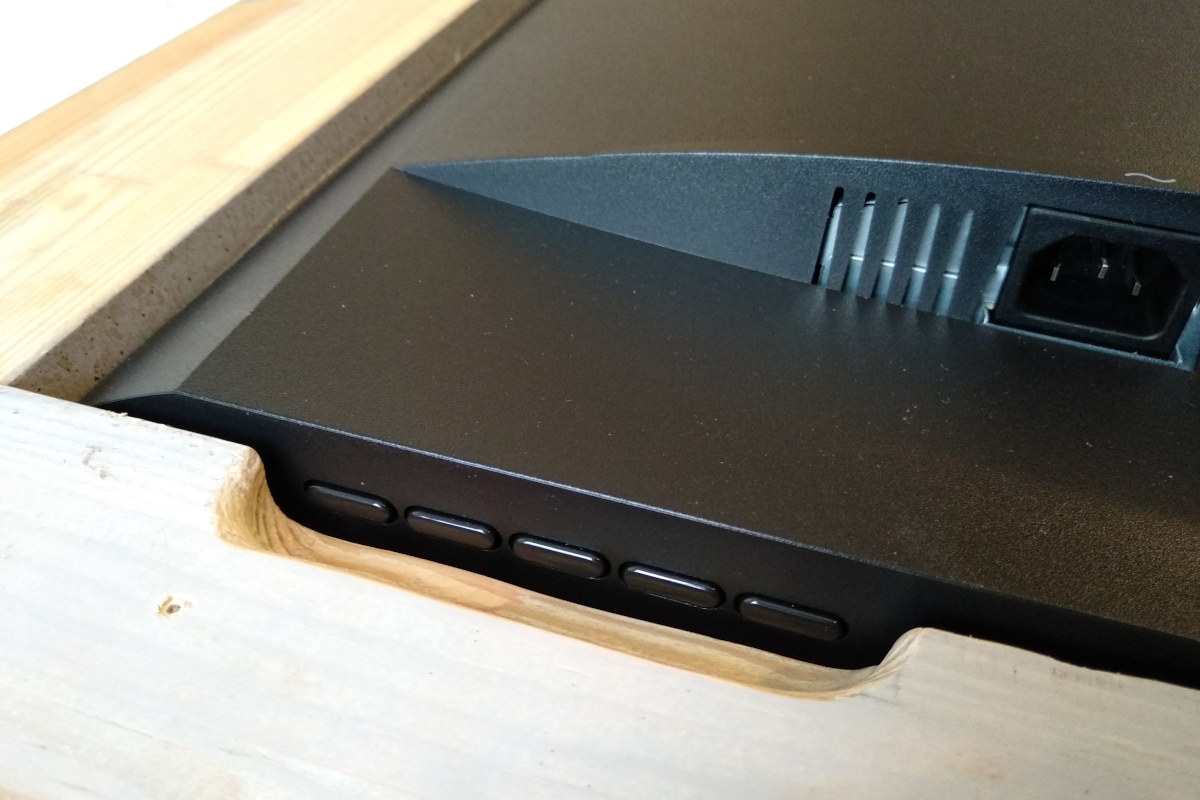
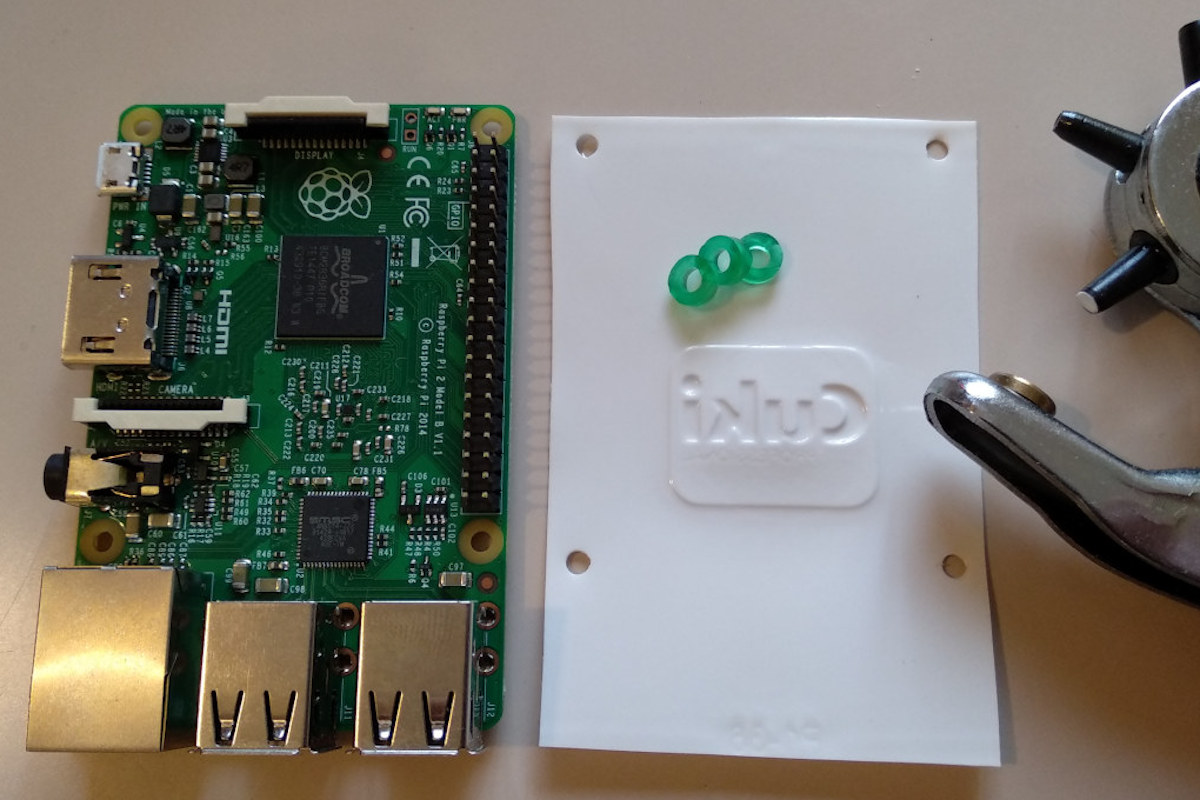
I had to cut some of the wooden frame to allow access to the monitor buttons, as you can see from the photograph of the detail. The Raspberry Pi is mounted with wood screws, an insulating plastic sheet and spacers made with rubber tube.
Tip to improve
As you can see from the final assemble, the bottom frame of the monitor is higher than the wood frame, so a black stripe remains visible at the bottom. It would have been better to make a passepartout all around the monitor to hide that difference.
photo-reframe
The software core of the digital frame is the photo-reframe-slideshow program. Its main feature is the ability to show pictures at a specific zoom and pan points, without requiring to actually cut the original pictures. You upload the original pictures along a playlist file, which contains the re-frame options to be applied on the fly.
CheatSheet
Here it is a Cheat Sheet to be printed on a 7×7 cm sticker and attached below the wireless keyboard. Some shortcuts are related to the photo-reframe program, others are related to the XFCE desktop (default and custom shortcuts).
| Space | Immagine successiva |
|---|---|
| Backspace | Immagine precedente |
| P | Avvia o ferma la presentazione |
| C | Mostra o nasconde il commento |
| I | Mostra o nascondi le info |
| +/- | Aumenta o diminuisce lo zoom |
| Frecce | Panoramica |
| Esc / Q | Esci |
| F1 | Help |
| F2 | Condividi via email |
| Ctrl-Q | Poweroff, Reboot, etc. |
| Alt-F1 | XFCE Menu |
| Alt-F2 | Run program |
RaspiOS customization
I downloaded and installed RaspiOS 2020-05-27 Buster, based on Debian 10. I choosed the full version “with desktop and recommended software”.
WiFi
I installed the Xfce desktop environment; on Debian 10 this is bundled with the NetworkManager service, which handles wired and wireless connections.
Beware that NetworkManager does conflict with the /etc/wpa_supplicant/wpa_supplicant.conf configuration file: if you configure a WiFi connection in this file, you will end-up with two wpa_supplicant instances conflicting each other (so you shouldn't even use the trick to setup a Raspberry Pi headless). Use instead the NetworkManager applet from the Xfce environment to connect to your WiFi network, the network preferences will be saved into /etc/NetworkManager/system-connections/.
Desktop Autologin
We want the Raspberry Pi to start automatically a graphic session, so in raspi-config we selected Boot Options ⇒ Desktop / CLI ⇒ Desktop Autologin. The logged-in user will be pi.
Syslog
To limit the useage of the SD card, we prefer to generate system logs in RAM instead of writing them to filesystem. So we installed the busybox-syslogd packages, which removes the rsyslog one. Once installed, you can see system log using the logread command.
GL Warning
Running the photo-reframe application on the Raspberry Pi will show a warning message:
libEGL warning: DRI2: failed to authenticate
It turned out that we have to set the GL Driver to avoid that warning. Once launched raspi-config, select Advanced Options ⇒ GL Driver (this choiche will install the gldriver-test package) ⇒ GL (Fake KMS).
Actually we used a fake workaround, because activating the Full KMS option causes several crashes of the graphical system, the errors logger are something like:
[drm:drm_atomic_helper_wait_for_dependencies [drm_kms_helper]]
    *ERROR* [PLANE:183:plane-21] flip_done timed out
[drm:drm_atomic_helper_wait_for_flip_done [drm_kms_helper]]
    *ERROR* [CRTC:74:crtc-2] flip_done timed out
[drm:drm_atomic_helper_wait_for_dependencies [drm_kms_helper]]
    *ERROR* [CRTC:74:crtc-2] flip_done timed out
[drm:drm_atomic_helper_wait_for_dependencies [drm_kms_helper]]
    *ERROR* [CONNECTOR:32:HDMI-A-1] flip_done timed out
Hide the mouse pointer
The photo-reframe program used as directory browser and slideshow, uses the setOverrideCursor() function to hide the mouse pointer when run full screen.
Neverthless, if you use only the keyboard to control the interface, the mouse pointer at the center of the screen is definitely annoying. Fortunately enough there is the Debian package unclutter: once installed you will find a running process when you initiate your desktop session:
/usr/bin/unclutter -idle 1 -root
The mouse pointer will disappear after one second of idle time, just to reappear if you move the mouse. If you want to customize the options, change the file /etc/default/unclutter.

Turning off the power LED
When the digital frame is in stand-by (the screen is black and turned off), there is a red light glow around the frame, caused by the Raspberry Pi power LED being very bright, this is particularly disturbing when the room is dark. Fortunately enough there is a way to turn off the LEDs, just add the following snippet at the end of /boot/config.txt and reboot:
# Disable Ethernet LEDs
dtparam=eth_led0=14
dtparam=eth_led1=14

# Disable the PWR LED
dtparam=pwr_led_trigger=none
dtparam=pwr_led_activelow=off

# Disable the Activity LED
dtparam=act_led_trigger=none
dtparam=act_led_activelow=off
This works well on my Raspberry Pi 2 model, the matter is discussed in a post of the RaspberryPi.org forum.
Keyboard Shortcut
We choosed XFCE as Desktop Environment, so we can use Settings ⇒ Keyboard ⇒ Application Shortcuts to associate a key combination to an action. We decided to associate Ctrl-Q with the applet xfce4-session-logout. The setting is saved into $HOME/.config/xfce4/xfconf/xfce-perchannel-xml/xfce4-keyboard-shortcuts.xml.
Screen Saver
The program photo-reframe is configured to call two external programs, one to disable the screensaver (at program start) and one to re-enable the screensaver (at program exit). The two helper programs should be named screensaver-off and screensaver-on respectively, and they are searched into the PATH. In this way you can leave the desktop power saving active: the screen will remain active if a slideshow is running, but it goes blank otherwise.
Beware that the xfce4-power-manager program overloads the functionality offered by DPMS (controlled by the xset program); e.g. the screen blanking is perfomed even with DPMS disabled. The reccommended XFCE power manager settings (Settings ⇒ Power Manager ⇒ Display) are:
- Display power management: On - This will enable DPMS.
- Blank after: Never - This prevents the software screen blanking (no DPMS).
- Put sleep after: 5 minutes - This is enforced via DPMS Standby.
- Switch off after: 6 minutes - This is enforced via DPMS Off.
With these settings display blanking is controlled by DPMS only (no software blanking); the slideshow program can simply disable DPMS to keep the screen always on. XFCE saves the Power Manager settings into the file $HOME/.config/xfce4/xfconf/xfce-perchannel-xml/xfce4-power-manager.xml.
screensaver-off
#!/bin/sh
# Disable software screen saver.
xset s off
# Disable DPMS screen saver.
xset dpms force on
xset -dpms
screensaver-on
#!/bin/sh
# Disable software screen saver.
xset s off
# Enable DPMS screen saver.
xset dpms 300 300 300
xset +dpms
How to use xset
With the command xset q it is possibile to query the status of the DPMS (you must be the user owning the X display):
xset q
...
DPMS (Energy Star):
  Standby: 600    Suspend: 600    Off: 600
  DPMS is Enabled
  Monitor is On
On the Raspberry Pi, the auto-logon user is pi, if you are root you can set the DISPLAY and XAUTHORITY environment variables before calling xset. Check the running Xorg process to get such variables:
ps -C Xorg ho args
/usr/lib/xorg/Xorg :0 -seat seat0 -auth /var/run/lightdm/root/:0 -nolisten tcp vt7 -novtswitch
Now you can execute xset as user root:
export DISPLAY=":0" XAUTHORITY="/var/run/lightdm/root/:0"; xset q
If you disable the screensaver from the desktop environment (in our case XFCE Settings ⇒ Power Manager ⇒ Display), you will see the line DPMS is Disabled in xset q output.
Desktop Fonts
To have bigger fonts into XFCE menu we opened the Settings ⇒ Appearance ⇒ Fonts menu and increased the font size. Settings are saved into the file $HOME/.config/xfce4/xfconf/xfce-perchannel-xml/xsettings.xml.
Executing programs from the Firefox browser
Our digital frame will use a web page as the main user interface; the browser will start automatically at boot time and it will connect to a page located on http://localhost/. A local running Apache+PHP will serve the page showing thumbnails for image folders.
Basically from the web page we want to be able to execute two actions:
- The slideshow program photo-reframe to actually view the slideshow.
- Shell scripts using the bash shell, to do actions like shutdown, reboot, etc.

Firefox customization
RaspiOS 2020-05-27 Buster (based on Debian 10.4) installaed Firefox Version 68.12.0esr.
Disable the session restore page
If Firefox is badly closed (e.g. due a power outage, etc.), when it starts again it display the page about:sessionrestore. To disable this behaviour open the about:config and set:
browser.sessionstore.resume_from_crash => false
Disable the status panel
Firefox shows a status bar in the lower left corner of the window, where it shows the URL currently focused or under the mouse. To disable this feature open the about:config page and set:
toolkit.legacyUserProfileCustomizations.stylesheets => True
then create a file $HOME/.mozilla/firefox/<random-id>.default-esr/chrome/userChrome.css with this content:
@namespace url("http://www.mozilla.org/keymaster/gatekeeper/there.is.only.xul");
#statuspanel { display: none !important; }
See this support page.
Starting in fullscreen mode
We choosed the AutoFullscreen extension, by tazeat. Open the Firefox Menu ⇒ Addons ⇒ Extensions and search for it. Once installaed, it is saved into the directory $HOME/.mozilla/firefox/<random-id>.default-esr/extensions/{<random-id>}.xpi.
With that extension loaded, Firefox will start in fullscreen automatically. Press F11 as usual to toggle this state.
Programs Autostart
We want to run automatically two processes at startup
- The Firefox browser, pointing to http://localhost/. This is the main user interface, used to browse image folders and to start the slideshow.
- The photo-reframe program to show images from a randomly generated playlist. This is the slideshow started automatically at startup.
We achieve this creating two .desktop files into the .config/autostart directory of the pi user.
This is the /home/pi/.config/autostart/firefox-esr.desktop file:
[Desktop Entry]
Name=Firefox ESR
Comment=Browse the World Wide Web
GenericName=Web Browser
X-GNOME-FullName=Firefox ESR Web Browser
Exec=/usr/lib/firefox-esr/firefox-esr http://localhost/
Terminal=false
X-MultipleArgs=false
Type=Application
Icon=firefox-esr
Categories=Network;WebBrowser;
StartupWMClass=Firefox-esr
StartupNotify=false
Path=
This is the /home/pi/.config/autostart/play-playlists.desktop file:
[Desktop Entry]
Type=Application
Version=1.0
Name=Play-Playlists
Icon=image
TryExec=/home/pi/Scripts/play-playlists.sh
Exec=/home/pi/Scripts/play-playlists.sh --delay 16
Terminal=false
Fixed WiFi MAC address
Everytime the Raspberry Pi is rebooted, it gets a new MAC address for the wlan0 interface. This is a feature provided by the Network Manager package.
If you want to disable this behaviour, create a new file /etc/NetworkManager/conf.d/100-disable-wifi-mac-randomization.conf whith this content:
[connection]
wifi.cloned-mac-address=1

[device]
wifi.scan-rand-mac-address=no
See the man page for nm-system-settings.conf, the article Randomize your MAC address using NetworkManager and this post on how to disable it on the Raspberry Pi.
Alternatively you can uninstall the NetworkManager package and use dhcpcd5 for all the network settings.

