Table of Contents
Kodi CoreELEC on the X96 Mini Android TV Box
How to install Kodi on the X96 mini TV Box
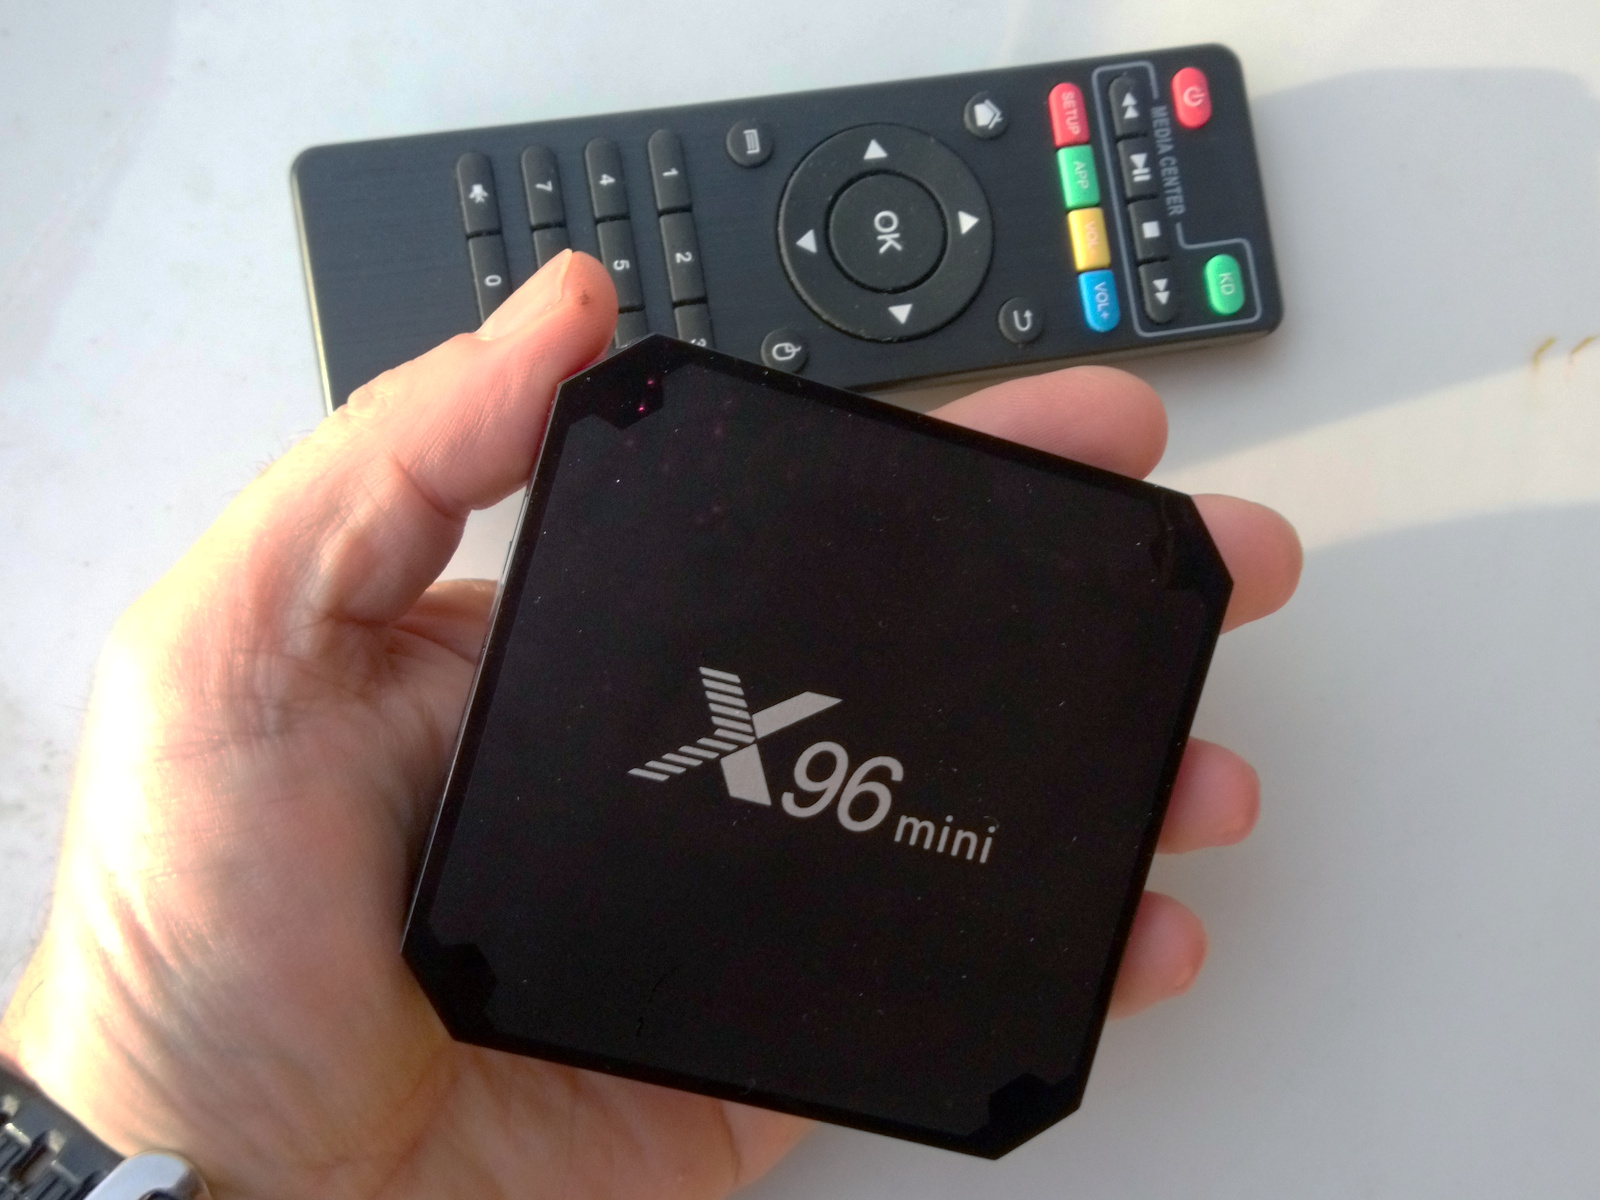
 I bought this little device for about 27 EUR in January 2022 from Aliexpress, I wish to use it as a TV Box, getting media from the LAN or from an external hard disk atthached via USB. It is based on the Amlogic S905W chip, equipped with 1 Gb of RAM and 16 Gb of flash storage.
The device is shipped with Android 9 and some apps installed on it. Among the installed apps you can find Kodi 18, Youtube, Netflix, etc. I want a better control of the hardware and of the operating system and I need only the Kodi app, so I decided to install a Kodi distribution on the SD card. Fortunately this device can boot from the SD card, leaving the original operating system on the flash memory untouched.
It seems that the best combination of Kodi and GNU/Linux operating system for this device is the one offered by CoreELEC.
Download the appropriate version of CoreELEC
From the download section I selected the appropriate options of my X96 Mini:
| Device | X96 Mini |
|---|---|
| RAM Variant | 1G |
| DTB | gxl_p281_1g |
| SoC | S905W |
SD card preparation
I used mu GNU/Linux computer to prepare a 16 Gb micro SD card.
- Donwload the image CoreELEC-Amlogic-ng.arm-19.4-Matrix_rc2-Generic.img.gz and gunzip it.
- Copy the image over an SD card using the Linux command line tool dd:
dd if=CoreELEC-Amlogic-ng.arm-19.4-Matrix_rc2-Generic.img of=/dev/sdb bs=4M conv=fsync
- Mount the first partition on the SD card and copy the file device_trees/gxl_p281_1g.dtb into the root directory, renaming it to dtb.img.
Ports and connectors
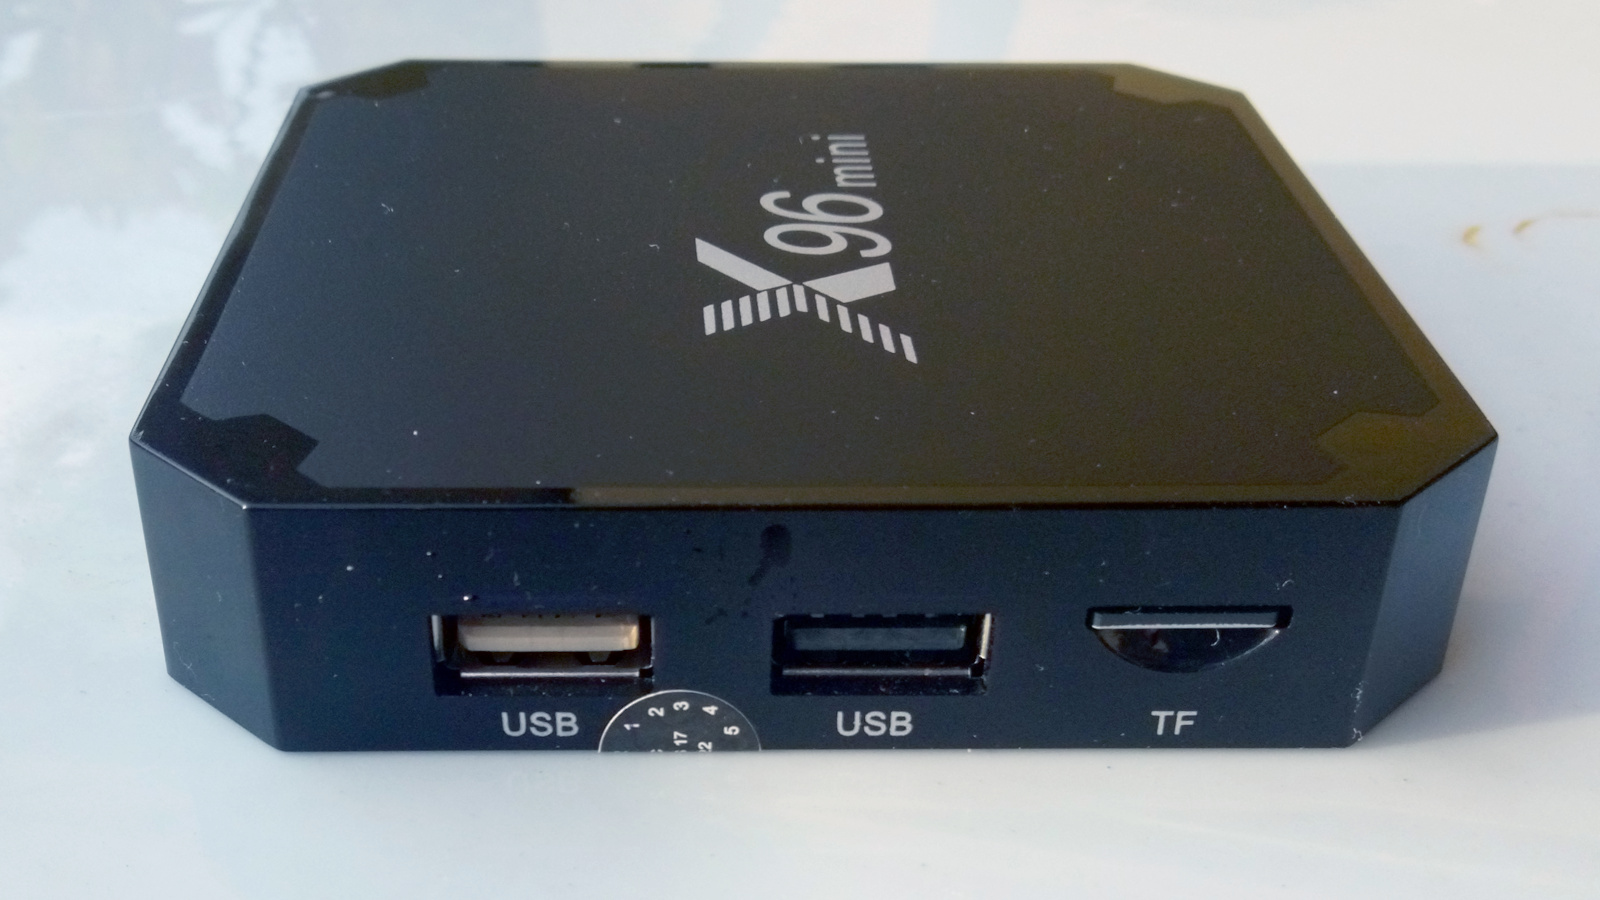
One USB port is white in color, so it should be an USB 1.x, the black USB port should be instead an USB 2.0 Hi-Speed. But measuring the read/write performance of an USB external disk, it turned out that both the ports are 2.0 Hi-Speed.
First boot using the toothpick trick
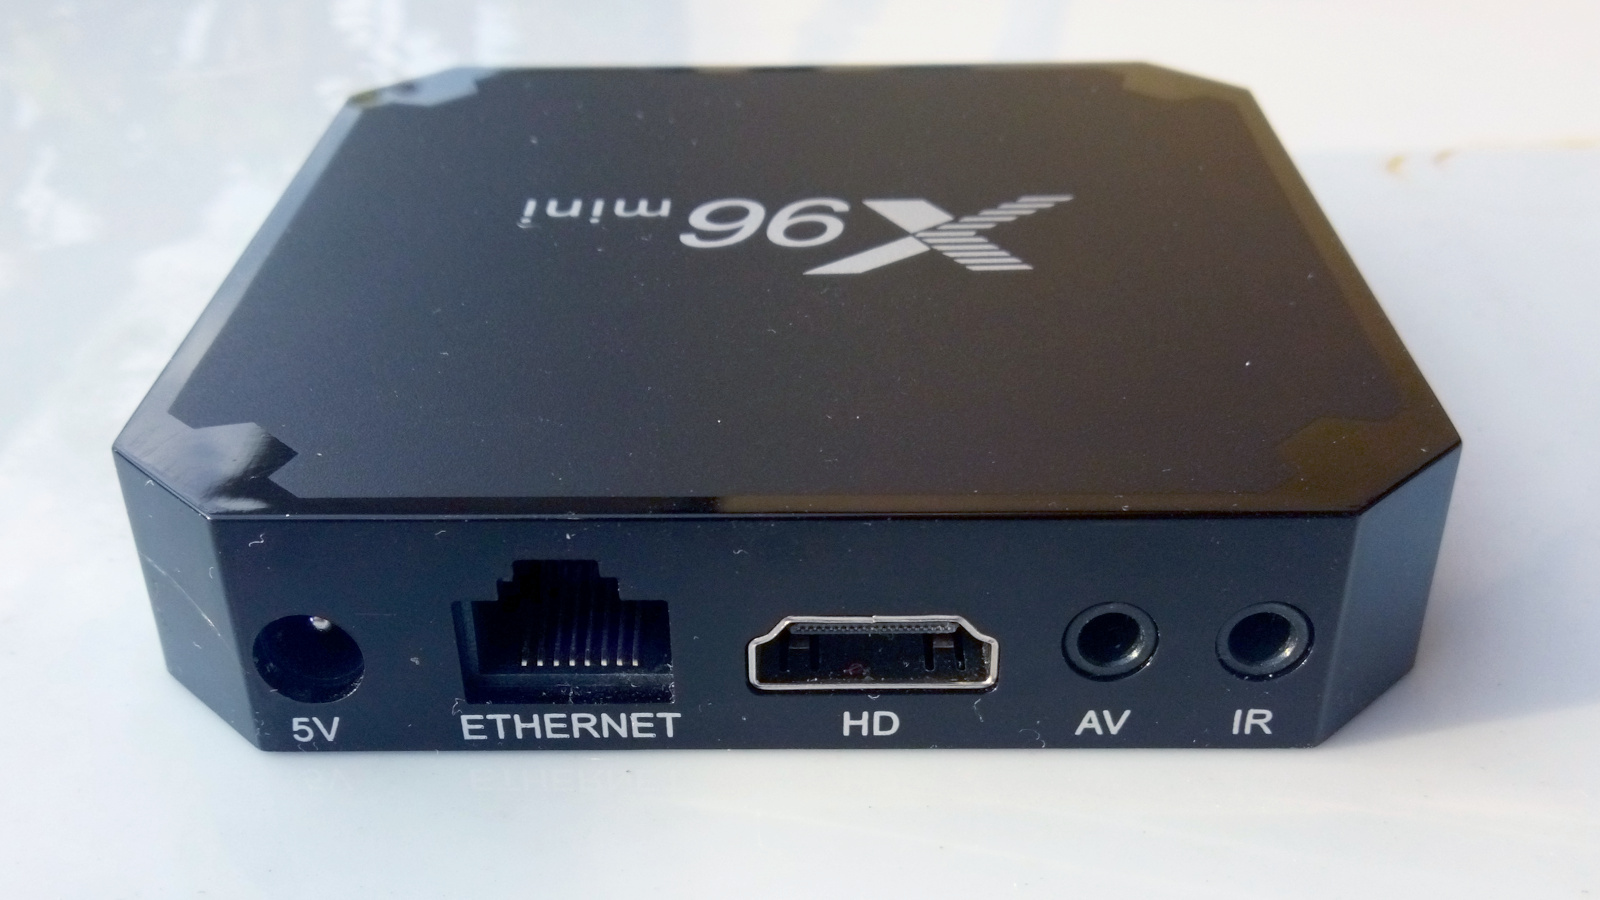
The X96 Mini, like many other Amlogic devices, have an hidden reset button inside the AV jack. Get a wood toothpick, make it a bit rounded removing the tip and insert it into the AV jack, you should feel the click of the button. Do some experimentation with the device turned off until you are sure you can press it correctly.
- Remove the power jack from the device.
- Connect the HDMI cable to the TV.
- Press the reset button with the toothpick and keep it pressed.
- Connect the power jack, still keeping the reset button pressed.
- Wait some seconds until you see the CoreELEC screen. On the top-left corner you can see some writings about the ongoing writing process; you can release the reset button.
Configure the remote control
The remote control provided with my device does not work out-of-the-box in CoreELEC. I created a custom remote control keymap for LIRC and customized the remote Kodi keymap. Now the remote control is fully functional, including power off (go in stand-by) and power on (resume from standy-by).
Connect to the CoreELEC box via SSH and stop the Kodi and LIRC (Linux Infrared Remote Control) services:
systemctl stop kodi
systemctl stop eventlircd
Check if the remote is generating some events detected by the GNU/Linux LIRC subsystem: run the following command:
ir-keytable -p NEC,RC-5,RC-6,JVC,SONY -t
Press some keys on the remote; this is an example of the output when pressing the OK key on the remote:
CoreELEC:~ # ir-keytable -p NEC,RC-5,RC-6,JVC,SONY -t
Protocols changed to rc-5 jvc sony nec rc-6
Testing events. Please, press CTRL-C to abort.
496.280087: event type EV_MSC(0x04): scancode = 0x113
496.280087: event type EV_SYN(0x00).
It turned out that my remote is using the NEC protocol (just experiment with the -p option above).
To get a list of valid button names run the command:
irrecord --list-namespace
Now it is possible to create a map from scancodes to button names; I created the file /storage/.config/rc_keymaps/X96MINI_KODI with the following map:
# table X96MINI_KODI, type: NEC
0x140 KEY_POWER
0x144 KEY_VIDEO         # KD Button
# Media center keys
0x155 KEY_PREVIOUS
0x15a KEY_PLAYPAUSE
0x152 KEY_STOP
0x154 KEY_NEXT
# Color buttons
0x143 KEY_RED           # SETUP
0x10f KEY_GREEN         # APP
0x110 KEY_VOLUMEDOWN
0x118 KEY_VOLUMEUP
# Arrows keypad
0x151 KEY_LEFT
0x150 KEY_RIGHT
0x116 KEY_UP
0x11a KEY_DOWN
0x113 KEY_ENTER
# Extra buttons
0x111 KEY_HOME
0x119 KEY_ESC
0x14c KEY_CONTEXT_MENU
0x100 KEY_INFO          # Mouse
# Numeric keypad
0x101 KEY_0
0x14e KEY_1
0x10d KEY_2
0x10c KEY_3
0x14a KEY_4
0x109 KEY_5
0x108 KEY_6
0x146 KEY_7
0x105 KEY_8
0x104 KEY_9
0x141 KEY_MUTE
0x142 KEY_TEXT          # Backspace
This table must be listed into the file /storage/.config/rc_maps.cfg:
# driver        table   file
meson-ir        *       X96MINI_KODI
To load the new key table:
ir-keytable -a /storage/.config/rc_maps.cfg -s rc0
Using ir-keytable again, you can verify that the key name is now associated witht the scancode, e.g. pressing the left key you should get:
CoreELEC:~ # ir-keytable -p NEC -t
Protocols changed to nec
Testing events. Please, press CTRL-C to abort.
9641.553993: event type EV_MSC(0x04): scancode = 0x151
9641.553993: event type EV_KEY(0x01) key_down: KEY_LEFT(0x0069)
9641.553993: event type EV_SYN(0x00).
9641.565262: event type EV_MSC(0x04): scancode = 0x151
9641.565262: event type EV_SYN(0x00).
9641.692059: event type EV_MSC(0x04): scancode = 0x151
9641.692059: event type EV_SYN(0x00).
9641.948038: event type EV_KEY(0x01) key_up: KEY_LEFT(0x0069)
9641.948038: event type EV_SYN(0x00).
Finally you can restart LIRC and Kodi services:
systemctl start eventlircd
systemctl start kodi
Every key on my remote was properly mapped from a LIRC button name to a Kodi action, except the backpasce key (scancode 0x142). The problem is that Kodi LIRC map convert the KEY_BACKSPACE into the back action, which is the same as KEY_ESC. See the file /usr/share/kodi/system/Lircmap.xml.
So I decided to associate the scancode 0x142 to the unused KEY_TEXT button, which in turn is associated to the teletex LIRC event. Then I created a custom Kodi remote keymap, to associate that remote event to the Backspace Kodi action. This is the file /storage/.kodi/userdata/keymaps/remote.xml:
<keymap>
  <global>
    <remote>
      <teletext>BackSpace</teletext>
    </remote>
  </global>
</keymap>
Change SSH password and enable RSA keys
From Kodi interface, Settings ⇒ CoreELEC ⇒ Services there is the SSH section, where you can change password or disable password logins if you have copied RSA keys into /storage/.ssh/authorized_keys (make it with mode 0400).
To configure the SSH service you cannot edit the files into /etc/ssh/, beacuse they are on a read/only filesystem. There is the file /storage/.cache/services/sshd.conf where you can define the variable SSH_ARGS and pass some extra parameters to the sshd daemon (e.g. the TCP port, using the -p option).
You can also customize the systemd service unit, just copy the system file and edit it:
cp /usr/lib/systemd/system/sshd.service /storage/.config/system.d/
vi /storage/.config/system.d/sshd.service
Shadow password (if changed) cannot be saved into /etc/shadow, because of read-only filesystem. Check instead /storage/.cache/shadow.
Enable crontab
From Kodi interface, Settings ⇒ CoreELEC ⇒ Services check Enable Cron.
Then connect via SSH and create a directory where to store the scripts to be executed via cron, e.g. /storage/bin/. Then edit the crontab for the root user executing crontab -e. This example will run the script name heartbeat every 10 minutes:
*/10 * * * * /storage/bin/heartbeat
The users' crontabs are saved into the /storage/.cache/cron/crontabs/ directory.
Backup of library and configuration
From Kodi interface, Settings ⇒ CoreELEC ⇒ System ⇒ Backup there is the Create System and Kodi Backup item. With this you can create an archive containing all the CoreELEC settings and the Kodi library, including the thumbnails directory. The archive file will be stored into /storage/backup/ and you need to copy it into a remote host if you want.
The file is a tar archive of the following directories:
- /storage/.cache
- /storage/.config
- /storage/.kodi
- /storage/.ssh
Installing extra software with Entware
Entware is a software repository for embedded devices which use the Linux kernel, primarily routers and network attached storages. All packages are compiled for use on eight of the most commonly used architecture toolchains.
The architecture of the X96 Mini is aarch64 as revealed by the command uname -m and the kernel is a Linux 4.9 as revealed by uname -a. The Entware repository provides the aarch64 architecture for kernel 3.10 into the http://bin.entware.net/aarch64-k3.10/ directory, fortunately it seems that the libc library and some of the binares does run on the newer 4.9 kernel.
The CoreELEC distribution does not inlcue any package manager, so we have to download and unpack the Entware packages manually. All the Entware software is packed to be installed into the /opt/ hiearchy, which in CoreELEC is a symlink to the /storage/.opt/, i.e. into the SD card space.
In this example we want to install the base64 utility which we need to send some archives via an http connection. First of all we dowloaded the libc_2.27-11_aarch64-3.10.ipk, which contains the libc library, required to run almost all the Entware binaries. An ipk file is actually a tar.gz archive. This archive cotains some metadata into the control.tar.gz file (e.g. package version, dependencies, etc.) that we will not use because we don't have a package manager. We want instead to unpack the data.tar.gz file from the root directory; inspecting the archive you can see that all the content lies into the /opt/ directory. Once installed the libc, we repeat the same installation with the coreutils-base64_9.1-1_aarch64-3.10.ipk package.
Some packages requires a postinst script to be run in order to initialize some configuration files, the file is contained into the control.tar.gz archive. E.g. the terminfo package - which is required to run most of the fullscreen tools, with colors and cursors, like the Midnigth Commander - initializes the /opt/etc/profile adding a line like this:
export TERMINFO=/opt/share/terminfo
Finally you have to adjust your PATH and eventually the LD_LIBRARY_PATH environment variables to take into account the path of the newly installed binay packages. I added the following into my /storage/.profile:
PATH='/opt/usr/local/bin:/opt/usr/local/sbin:/opt/bin:/opt/sbin:/usr/bin:/usr/sbin'
LD_LIBRARY_PATH='/opt/lib:/usr/lib'
Connecting a 2.5" hard disk via the USB
I connected an external hard disk; specifically it is a Toshiba MQ04UBF100, 2.5 inches hard drive, SATA 3.0, 1 Tb, using an USB 3.0 interface.
At first I tried to power the hard disk directly from the USB port of the X96 mini, but it turned out that the USB port does not provide enough power. The hard disk suddendly and randomly disconnect and re-connect with no reason. Here it is the relevant kernel messages displayed by the dmesg tool:
[  526.677574@2]- usb 1-2: USB disconnect, device number 2
[  526.678631@2]- blk_update_request: I/O error, dev sda, sector 903710960
...
[  526.942573@3]- EXT4-fs error (device sda1): ext4_journal_check_start:56: Detected aborted journal
[  526.942578@3]- EXT4-fs (sda1): Remounting filesystem read-only
[  526.942585@3]- EXT4-fs (sda1): previous I/O error to superblock detected
[  526.942612@3]d Buffer I/O error on dev sda1, logical block 0, lost sync page write
[  526.983449@2]- sd 0:0:0:0: [sda] Synchronizing SCSI cache
[  526.997855@2]- sd 0:0:0:0: [sda] Synchronize Cache(10) failed: Result: hostbyte=DID_NO_CONNECT driverbyte=DRIVER_OK
[  527.796877@2]- usb 1-2: new high-speed USB device number 4 using xhci-hcd
[  527.938266@2]- usb 1-2: New USB device found, idVendor=0480, idProduct=0901
[  527.938278@2]- usb 1-2: New USB device strings: Mfr=2, Product=3, SerialNumber=1
[  527.938282@2]- usb 1-2: Product: External USB 3.0
Typically a 2.5“ drive requires about 1 A at startup and about 500 mA at read/write average. It is likely that the X96 Mini's circuitry provides USB ports with barely the minimum required by the USB 2.0 standard, which is 5 V, 500 mA, regardless the rating of the power supply (mine was rated 4A).
Fortunately there is a solution: to use an externally powered USB hub. I purchased a 4 ports USB 3.0 hub with an USB Type-C connector to supply it with power. In this new configuration a 3 A power supply provides the power to the USB hub. The external hard disk is connected to one of the 4 ports of the hub and it takes its power from this. The X96 Mini is connected to the hub cable through the USB A connector and it takes the power from the hub too. The original power supply is not longer required and all the system is powered by only one power supply.
I measured the disk performance on both the two USB ports (the white one and the black one), they measured exactly the same transfer rate. For the test I used the hdparm tool:
hdparm -t /dev/sda
Timing buffered disk reads: 102 MB in 3.03 seconds = 33.71 MB/sec
This is about 270 Mbit/s, which is near the 280 Mbps of the USB 2.0 High Speed specifications. This means that both the USB ports are actually USB 2.0.


