Table of Contents
rigacci.org
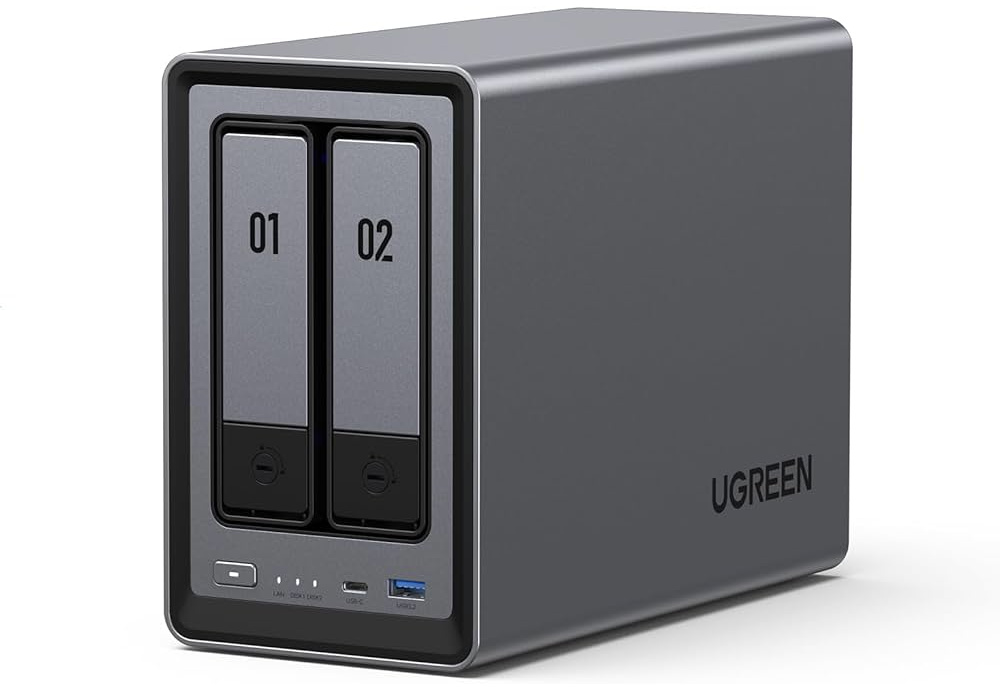
UGREEN NASync DXP2800
Un NAS bastato su architettura Intel N100 con una dotazione di RAM sufficiente e abbastanza spazio su SSD eMMC per installare un sistema operativo completo, ad esempio Debian 13 Trixie. La dotazione di una porta HDMI lo rende capace di essere anche un media center completo.
Caratteristiche tecniche
| CPU | Intel(R) N100 4-cores |
|---|---|
| RAM | 8 Gb |
| SSD | 32 Gb eMMC |
| Ethernet | Intel Corporation Ethernet Controller I226-V 2.5 GbE |
| Video | Intel Corporation Alder Lake-N [UHD Graphics] |
| SATA | 2 bays for 3.5 or 2.5 inches, not hot-swappable |
| USB | 1xUSB 3.2 Gen2, 1xType-C USB 3.2, 1xUSB 3.2 Gen1, 2xUSB 2.0 |
| HDMI | 1xHDMI up to 4K |
| M.2 slots | 2 x NVMe 2280 SSD |
| LEDs | 4 x multi-color LEDs for power, netdev, disk1 and disk2. Programmable via I2C. Unofficial Debian packages exist to compile a custom kernel module and to provide controlling scripts. |
| Power | 12v/5A |
| BIOS Build date and time | 12/11/2024 10:48:40 |
| Boot mode | UEFI / Legacy |
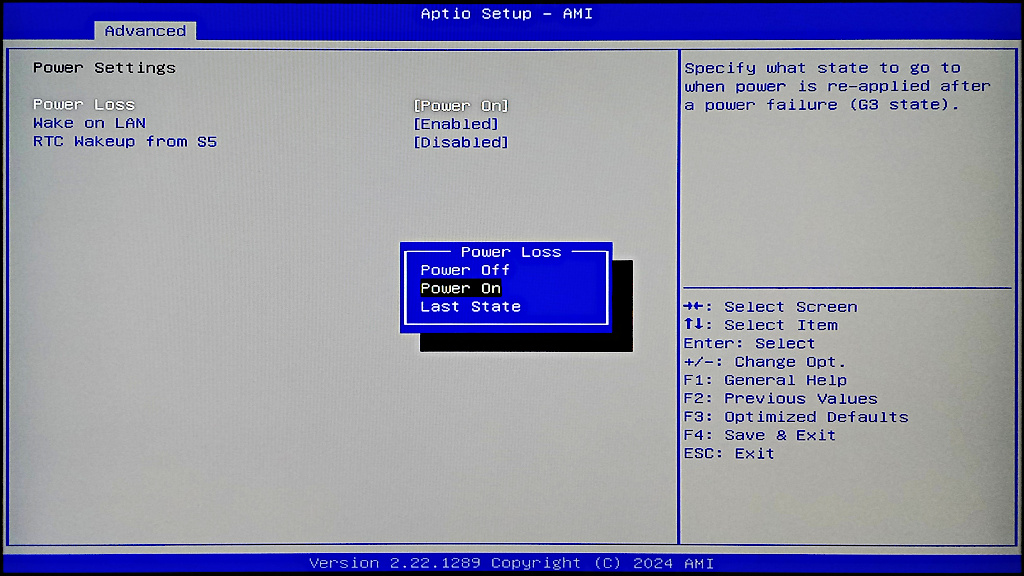
| Power Loss | Power Off / Power On / Last State |
| Boot from USB | Yes. Use the USB 2.0 port, disable the watchdog. |
| Wake on LAN | Supported |
| RTC Wakeup | Supported. Only HH:MM:SS, no weekday, no monthday. |
Accesso al BIOS e Boot Menu
Collega un monitor alla porta HDMI e una tastiera a una porta USB, accendi il dispositivo e premi la combinazione di tasti quando vedi il logo UGREEN:
| BIOS Keys | |
|---|---|
| Ctrl+F2 | Enter BIOS setup |
| Ctrl+F12 | Boot device selection |
Per impostazione di fabbrica, c'è un watchdog abilitato (tempo predefinito 180 secondi) che riavvia il dispositivo se il sistema operativo non provvede periodicamente ad azzerare il contatore. È necessario disabilitare il watchdog se si desidera installare un sistema operativo diverso. Anche durante la configurazione del BIOS il watchdog è attivo e bisogna essere rapidi a salvare le impostazioni.
Queste sono le impostazioni del BIOS più interessanti:
- BIOS
- Advanced
- WatchDog Setting
- Watch Dog Control [Disabled]
- Power Settings
- Power Loss
- Wake on LAN
- RTC Wakeup from S5
- Hardware Monitor
- Smart Fan Function
Alcune persone in rete affermano che è necessario premere Ctrl+F1 nel BIOS per abilitare il menu Advanced; nel mio caso quella pagina è abilitata di default.
Nei menu del BIOS si trovano le impostazioni per il Power Loss (con le tre opzioni classiche: Power Off, Power On e Last State), il Wake on LAN e il RTC Wakeup (avvio all'ora impostata). Purtroppo quest'ultimo è configurabile solo con ora, minuti e secondi, non è possibile scegliere il giorno della settimana o del mese.
How to disable the internal PDF viewer in Android Chrome

In recent versions of the Chrome app for Android (begin of 2025), you may find that tapping link pointing to a PDF document, will open the internal PDF viewer instead of your preferred app (mine is MuPDF viewer). On the net you may find several recipes to disable that behaviour, but they are eventually outdated (they refer to the Settings ⇒ Privacy and security ⇒ Site Settings ⇒ PDF documents, which does not exist anymore).
Also the the advice to go to Settings ⇒ Apps ⇒ your PDF viewer ⇒ Set as default is useless.
The solution of the problem now requires to open in Chrome the special link:
chrome://flags/
Then search for the Open PDF Inline on Android and Open PDF Inline on Android pre-V options and disable them both.

Vector Welding MIG 130A
Welding machine MIG 130A by Vector Welding - The Missing Manual

I purchased this welding machine for €146 (January 2025) on the Amazon website. The welding machine is sold by Vector Welding, based in Germany and is shipped from that country in a few days. The kit I purchased is ideal for beginners as it includes not only the continuous wire welder, but also a spool of flux-cored wire and an auto-darkening protective helmet.
This is a really interesting kit for the beginner hobbyist. The amperage limited to 130 A still allows you to easily weld sheets of up to 5 ~ 6 mm thick, but above all it allows you to use the device connected to a 3 kW home electrical system. It is not possible to weld with shielding gas, but the use of flux-cored wire is still a widely used technique that allows good results to be obtained.
In my opinion, the presence of an auto-darkening helmet is to be considered essential for the beginner: using a mask to raise and lower manually every time you start welding would add a significant level of difficulty, which is instead completely resolved with this accessory.
What I think you should buy right away to do your first experiments are a pair of welding gloves and a spool of 0.8 mm wire with its nozzle. In fact, experimenting with 1.0 mm wire on thin sheets (1 ~ 2 mm) is not recommended because the possibility of piercing the workpiece with the arc is very high.
The only sore point of the kit is the manual! Only a concise manual in German is provided, the content is poorly edited and sometimes contains information not pertinent to the model in question, being evidently produced with hasty copy and paste from the manual of other models. On the Vector Welding website or elsewhere on the internet there is no downloadable manual for the MIG 130 model. I translated the German version into English, using online tools and proceeded to integrate and improve it with other information found in other manuals online. Below is the result of my work.
Hacking the Insta360 ONE RS
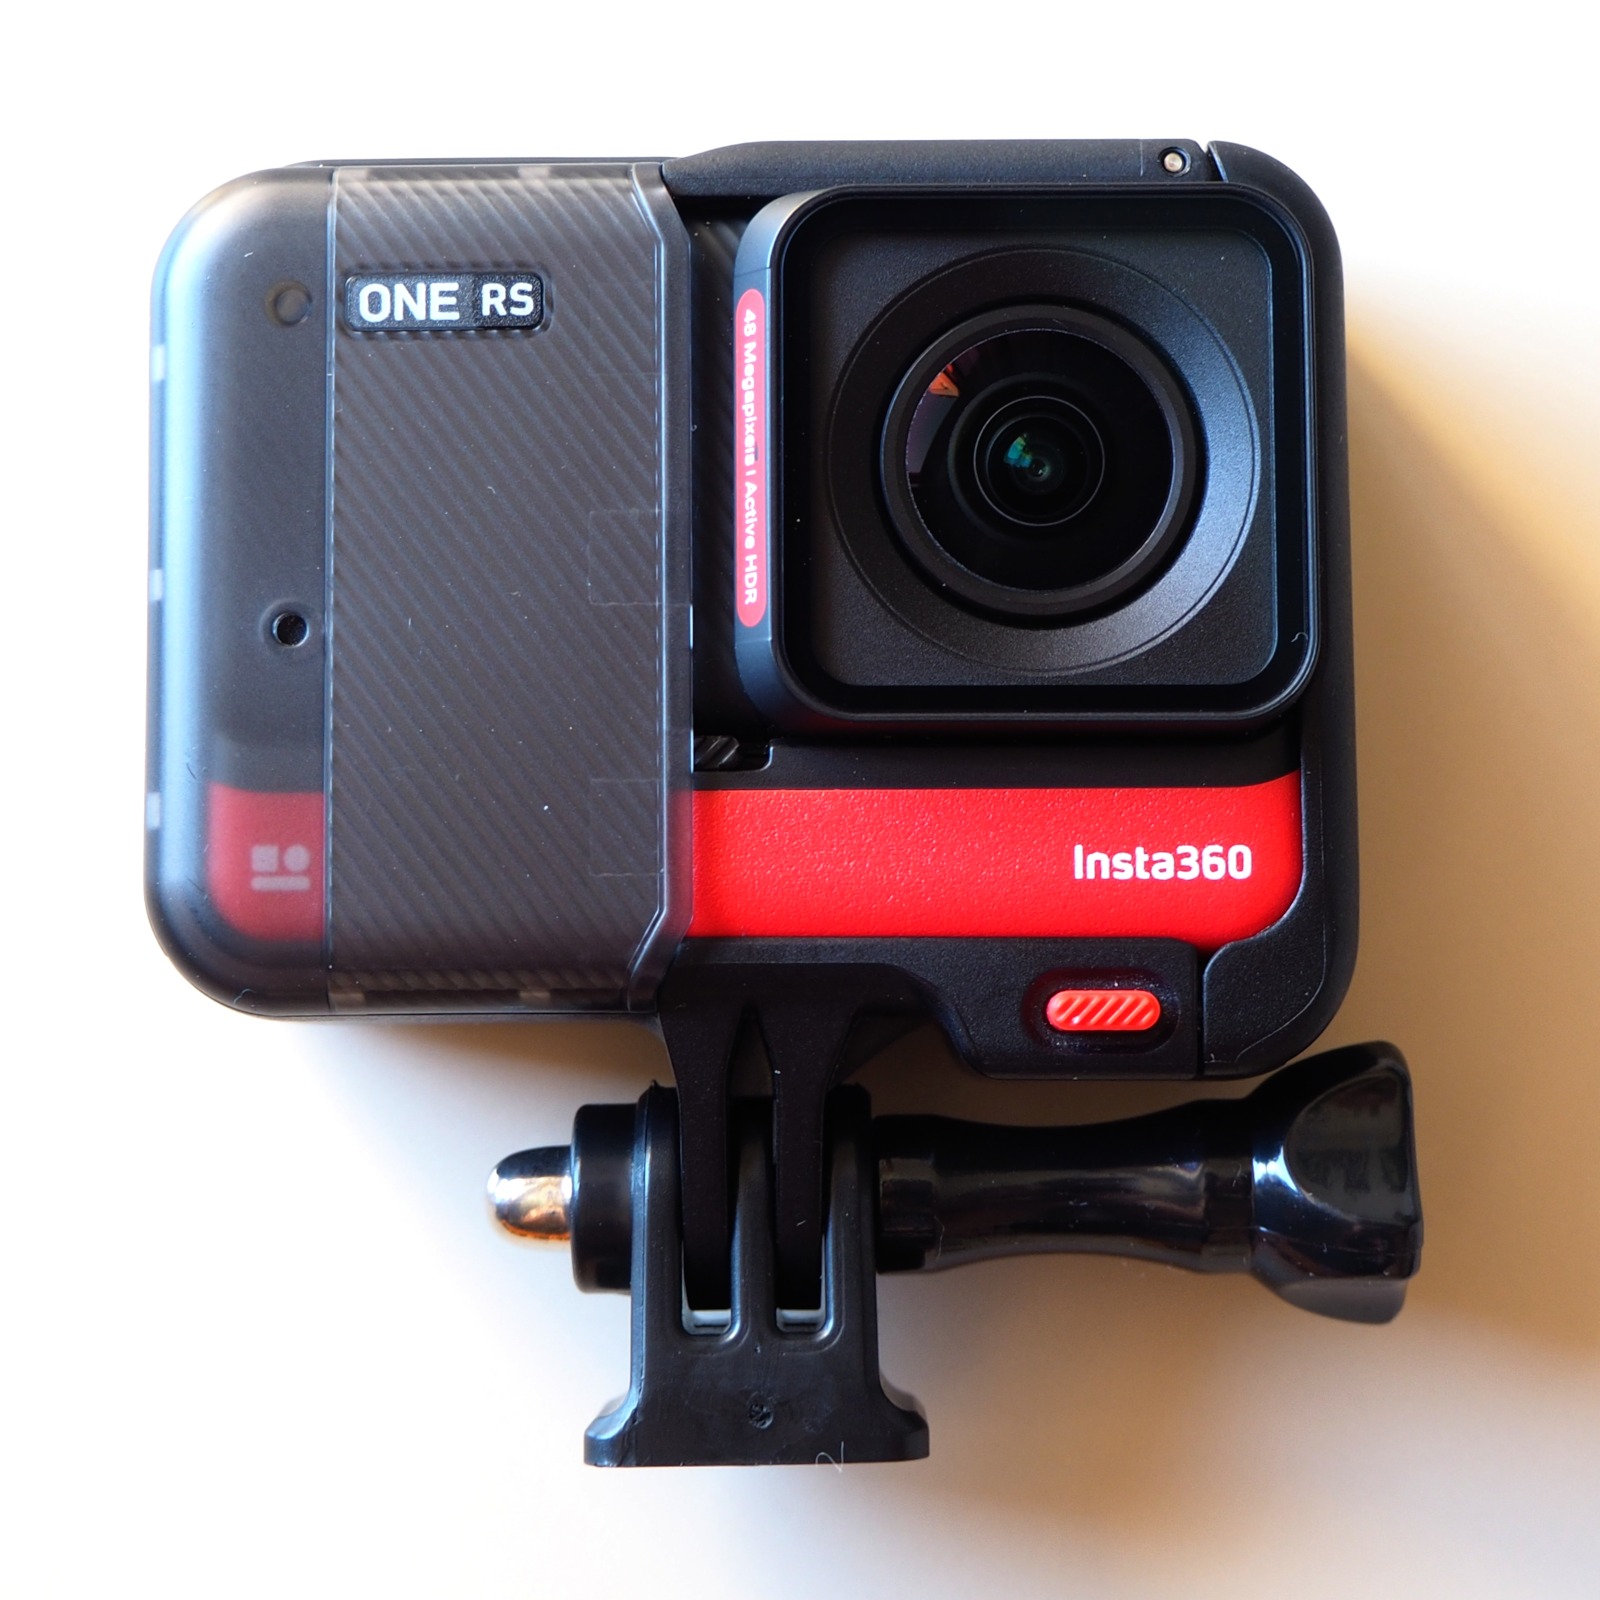 Just two years after purchasing the SJCAM SJ8 Pro, in June 2023 I decided to replace my action camera with a new Insta360 ONE RS. The SJCAM was quite good (but only after heavily customizing the firmware, both in terms of color balance and video codec parameters). The real sore point of the SJCAM is that it is impossible to use it without looking at the screen: if you press the REC button without looking you will never know if you have activated recording, if you have stopped it or if you have simply exited stand-by.
The Insta360 seems quite promising: it uses the same Ambarella H22 processor so it should allow the same level of hacking as the SJCAM, it seems to offer better support (firmware updates) and has different hardware modules (4K lens or dual 360° lens).
The best result I have achieved is to have reverse engineered the WiFi protocol, so that I can control the camera with open source programs (Python scripts) instead of the crap Android app that comes with it.
| Hardware Specifications | |
|---|---|
| Hardware | 00A |
| Firmware shipped | v2.0.0.4 |
| Firmware upgraded (2023-06-15) | v2.0.8.4 |
| Hardware SoC | Ambarella H22EVK K2 Board (DT) |
| CPU | AArch64 Processor, 4 cores |
| RAM | 90 Mb |
| NAND memory | Toshiba TC58NVG1S3H 256 MiB |
| Specifications with Boost 4K lens | |
| Sensor size | 1/2“ 8000×6000 pixels |
| Image resolution | 48 Mpixels JPEG |
| Focal length | 16mm (35 mm equiv.) |
| Aperture | F2.4 |
| Weight | 125.3 g |
| Size | 70.1 x 49.1 x 32.6 mm |
| Video resolution | 4K @60 fps |
A manual lens on a mirrorless camera
The Meike 25mm f1.8 on the Olympus E-M10 Mark II
On this page we will explain what it means to use a manual lens on a mirrorless camera. In particular we will use the Meike 25 mm f/1.8 lens on an Olympus E-M10 Mark II mirrorless camera. The Olympus is a Micro Four Thirds system camera, accepting lenses with auto focus, zoom and aperture controlled by wire. This means that normally the camera body controls via electrical signals all the settings of the lens, getting back lens information that will be embedded into the EXIF metadata.
On the other side, this Meike is a manual lens. It does not have any electronic component inside: there are no electrical contacts between the lens and the camera body. This means that focus and aperture are controlled by the mechanical rings on the lens itself and the camera does not have any idea about that settings, nor about what lens is actually mounted. The aperture ring works directly on the diaphragm blades: if you close the aperture, less light will hit the sensor and the camera will be able to evaluate the exposure.
I bought this lens for about 79.00 € in October 2022, on the Amazon marketplace.

 The body of the lens is build from metal, so it feels sturdy and solid. The aperture ring does not have mechanical feedback over the stops: it turns smoothly from f/1.8 to f/16 with a little friction, so it should not move inadvertently.
The focus ring also has a little friction that should prevent unwanted moves, the external element does not rotate on focusing, so you can mount e.g. a 49 mm polarizer filter and it will not rotate on focusing. A depth of field scale is printed on the lens body (but it is totally wrong, see below).
SJCAM SJ8 Pro Review
The SJCAM SJ8 Pro action camera was introduced in 2018, it features 4k video at 60 fps and gyroscope image stabilization. I purchaesd it in 2021 to work alongside my old Xiaomi Yi, mainly because I was interested in image stabilization.
Unfortunately SJCAM does not support this camera very much: the latest firmware upgrade is from September 2020, despite there are some evident bugs and several aspects of the user interface which should be improved. Thirdy part support is poor: there is no waterproof case except the original one, which unfortunately has a plastic window. There is not much documentation about customizing the firmware or scripting using the Ambarella Scripting.
See also my other page about this camera:
Kodi CoreELEC on the X96 Mini Android TV Box
How to install Kodi on the X96 mini TV Box
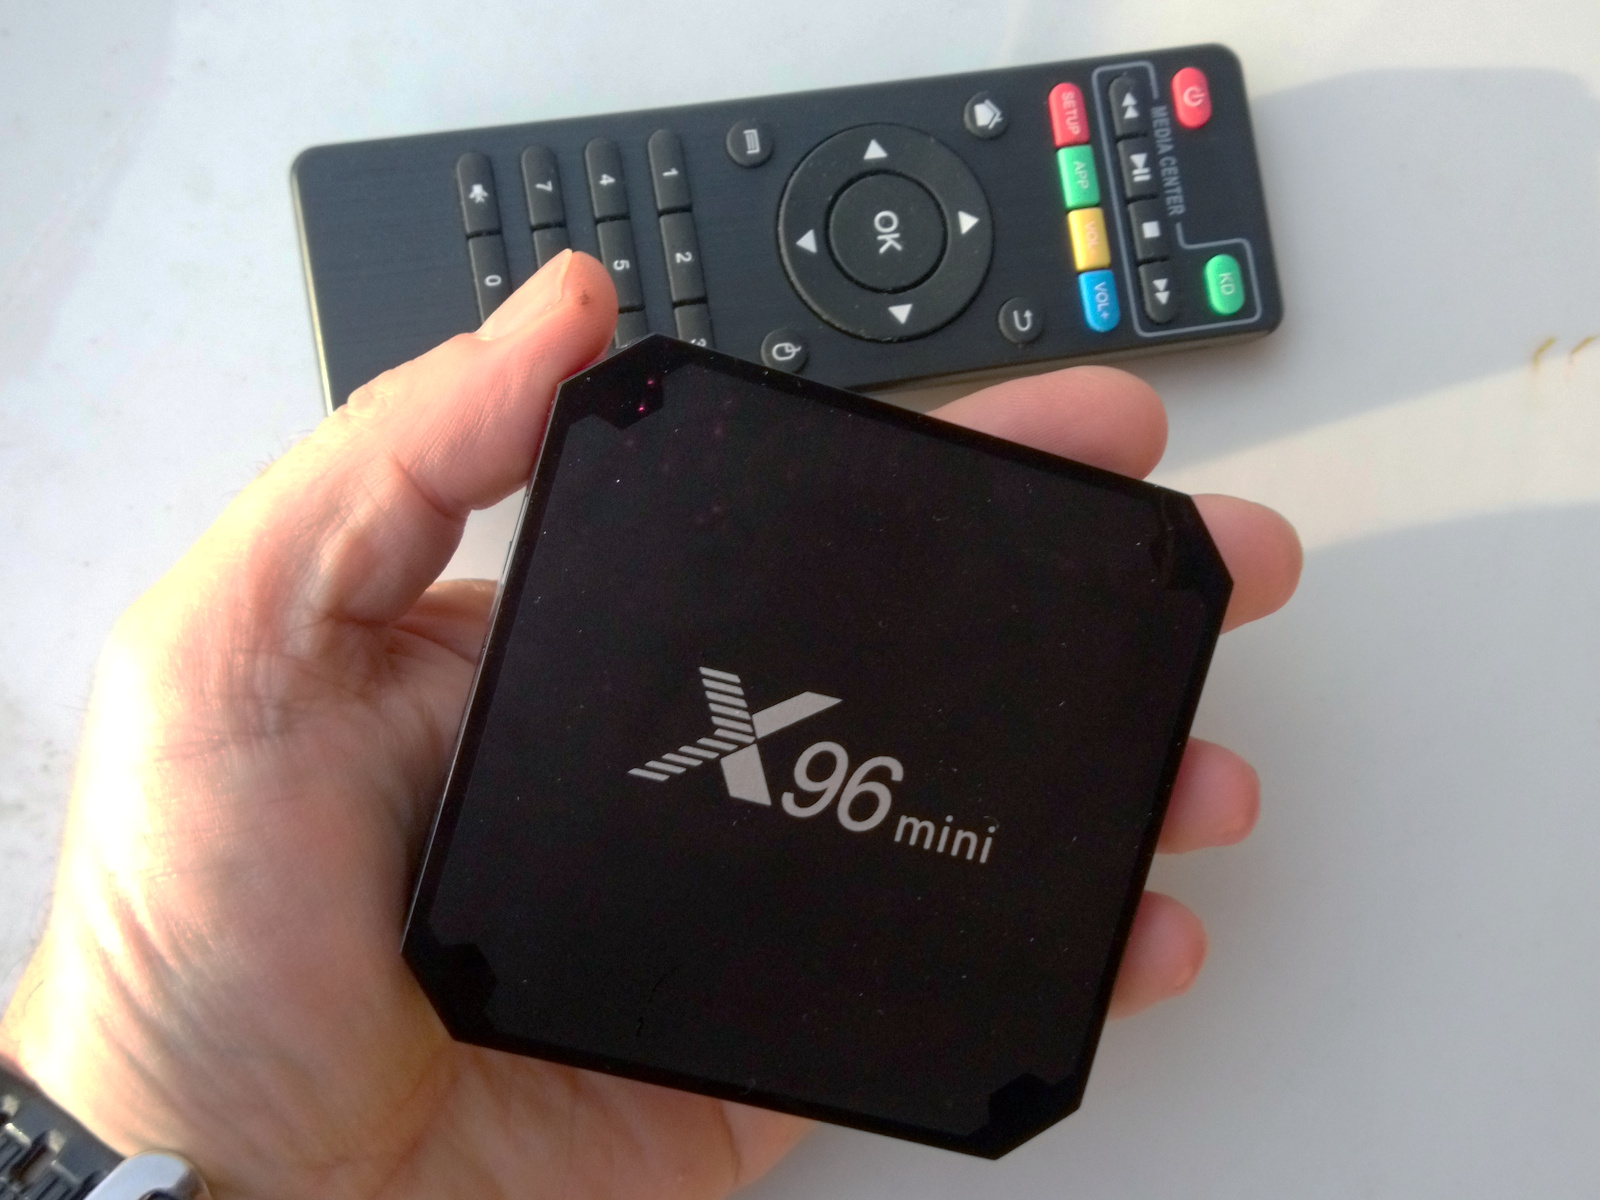 I bought this little device for about 27 EUR in January 2022 from Aliexpress, I wish to use it as a TV Box, getting media from the LAN or from an external hard disk atthached via USB. It is based on the Amlogic S905W chip, equipped with 1 Gb of RAM and 16 Gb of flash storage.
The device is shipped with Android 9 and some apps installed on it. Among the installed apps you can find Kodi 18, Youtube, Netflix, etc. I want a better control of the hardware and of the operating system and I need only the Kodi app, so I decided to install a Kodi distribution on the SD card. Fortunately this device can boot from the SD card, leaving the original operating system on the flash memory untouched.
It seems that the best combination of Kodi and GNU/Linux operating system for this device is the one offered by CoreELEC.
Rooting the Oukitel WP12 Android Phone
![]()
![]()
![]()
![]()
![]()
Rugged Android smartphone, pourchased in August 2021 at about 140 €, getting root privileges was rather easy.
| | New Android 11. 4 Gb RAM. 32 Gb Flash. 4000 mAh Battery. Easy rooting. Protected from dust and water immersion IP68. |
| | Outdated screen resolution 720×1440. Non replaceable battery. Notification LED does not exists. Poor screen protection due non raised border. |
| Model | Oukitel WP12 |
|---|---|
| Size | 174x81x14.3 mm, weight 237 g |
| RAM | 4.0 Gb |
| Internal Memory | 32 Gb |
| CPU | MediaTek Helio A22 - ARM Cortex-A53 1.8 GHz, 4 core |
| Screen | 5.5 inches, 720 x 1440, brightness 350 cd/m² typical |
| Battery | Non replaceable 4000 mA |
| Connector | Micro USB |
| Audio jack | 3.5 mm |
| Android | 11 |
| Build | alps-mp-r0.mp1-V8.67 |
| Aggiornamento sicurezza | April 2021 |
| Numero build | OUKITEL_WP12_EEA_V09_20210416 |
| A/B (Seamless) System Updates | Yes, current-slot: a Verified with fastboot getvar current-slot |
| Anti-Rollback Protection | GetVar Variable Not found Verified with fastboot getvar anti |
Remap keyboard keys in GNU/Linux
How to swap primary and secondary functions of the Fn key.
I have a Teclast F6 notebook where the function keys (F1, F2, … F12) are mapped on the keyboard as secondary: you have to press them together with the Fn key to get the function key. The primary function of the keys are the multimedia actions, like MUTE, VOLUMEDOWN, VOLUMEUP, PREVIOUSSONG, NEXTSONG, etc.
I searched a recipe to swap the first function of the key with the secondary one. The recipe here explained works almost at 100%, both into the textual console and into the X.org graphical environment. Unfortunately I was unable to swap the F1/DISPLAYTOGGLE key.
Pressing the BRIGHTNESSDOWN and BRIGHTNESSUP keys generates ACPI events: this is a different layer than the input subsystem. You can view ACPI events by running acpi_listen (from the acpid Debian package, the acpid service must be started):
acpi_listen
video/brightnessdown BRTDN 00000087 00000000 K
video/brightnessup BRTUP 00000086 00000000 K
It is possibile to customize the ACPI events to reassign the brightness keys to plain function keys, but it is not the preferred way (see ACPI and evemu), because it requires to run an additional sofware layer (the acpid daemon) and the execution of slow action scripts. The simplest method is to customize input events using udev and hwdb.
It seems that the LCD (DISPLAYTOGGLE) multimedia function is intercepted by the hardware and it is not handled as an input event nor as an ACPI event by the operating system.
Come salvare in PDF un libro da Google Libri
Se avete acquistato un libro con Google Libri avete molte meno libertà di quelle che avete quando acquistate un libro di carta. Tanto per cominciare potete leggerlo solo con il programma che ha deciso Google: sul telefonino esiste l'app Google Play Libri, sul desktop potete leggerlo nel browser dal sito Google. Impossibile farne una copia PDF per leggerlo ad esempio in un ebook reader oppure per poterlo stampare. E se il vostro account Google smette di funzionare? Il libro scompare. E se volete lasciare in eredità i vostri libri ai vostri figli? Scordatevelo.
Con questa ricetta è possibile salvare un libro in PDF catturando le schermate dal computer. È una soluzione di compromesso al ribasso: il file risultante conterrà le immagini delle pagine, quindi il testo non è cercabile né esportabile in qualche formato modificabile. Il file risultante sarà di dimensioni importanti (circa 20 Mb per 100 pagine). L'eventuale indice deve essere ricostruito a mano.
La ricetta un po' da smanettoni è eseguibile facilmente su un computer desktop GNU/Linux, la sua caratteristica è di poter scegliere la qualità delle immagini (risoluzione in pixel) a piacimento. C'è un po' di lavoro manuale da fare (premere due tasti per ogni pagina) e poi da eseguire degli script per comporre le singole immagini un un solo documento PDF.
- Impostare una risoluzione virtuale elevata. Ciò consente di simulare un monitor ad esempio di 1300×2000 pixel (notare il formato portrait), in modo che il browser visualizzi una pagina intera del libro a risoluzione elevata.
- Installare un programma di cattura schermo scriptabile; deve salvare la schermata senza richiedere interazione.
- Assegnare una scorciatoia da tastiera al programma di cattura.
- Acquisire tutte le pagine.
- Ritagliare le immagini rimuovendo i bordi inutili.
- Trasformare le singole immagini nel documento PDF.
- Aggiungere eventualmente un indice.
Ho provato la procedura su una Debian 10 Buster, ma non ci sono impedimenti ad eseguirla su altre distribuzioni.
Elettrocardiografo Contec 90A
L'ECG90A è un cardiografo costruito dalla cinese Contec, in Italia viene commercializzato da Gima e venduto su diversi portali on-line. Ho provato un modello acquistato on-line per circa 350 euro (novembre 2020).
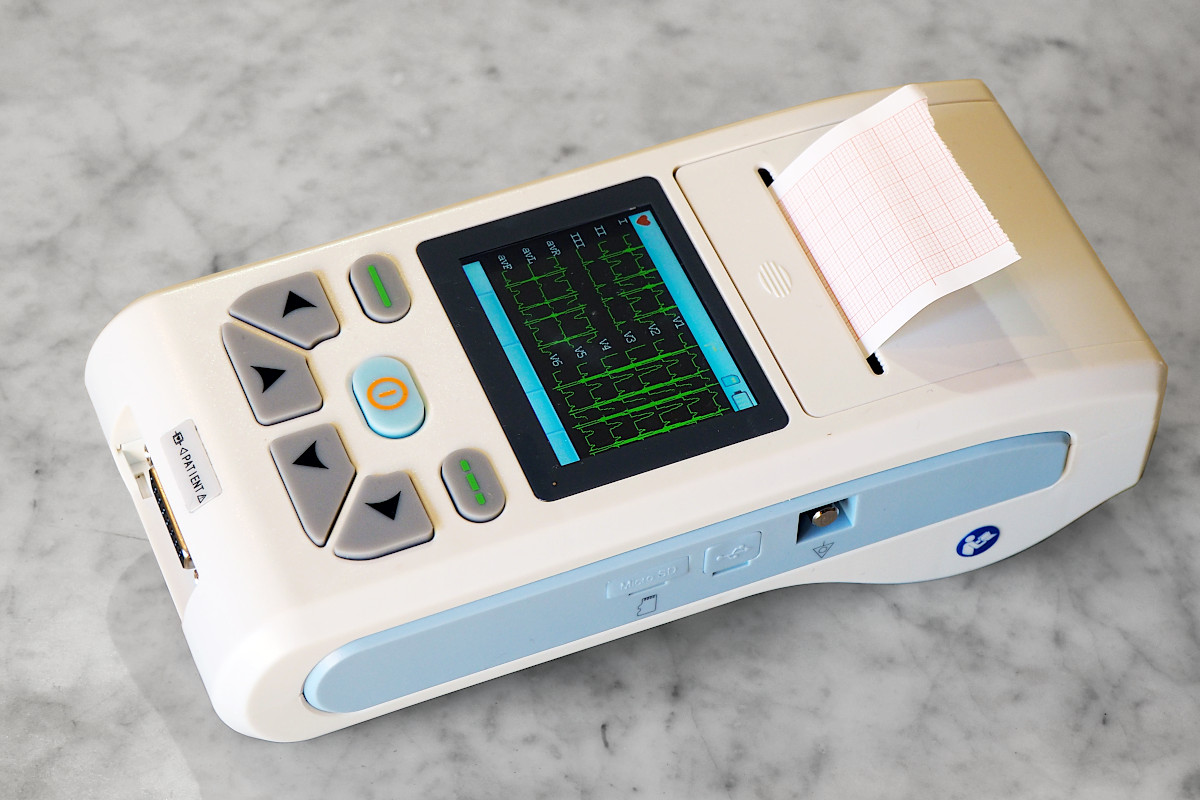 Gima ha fatto personalizzare la produzione aggiungendo il proprio logo sulla scatola e sul manuale. Il manuale (in fondo a questa pagina il PDF) è anche in italiano, ma lascia molto a desiderare in quanto a completezza di informazioni. Questa pagina nasce proprio per integrare ciò che non è documentato.
Il cardiografo è in grado di acquisire le 12 derivazioni standard, ma viene pubblicizzato come 3 canali. Il motivo è che il nastro di carta è molto stretto e si possono stampare al massimo tre tracciati contemporaneamente. La stampa delle 12 derivazioni avviene eventualmente in quattro sezioni consecutive, producendo una nastro di notevole lunghezza! Si può tuttavia scaricare i tracciati sul PC e per me questa è la caratteristica più interessante.
Lo strumento è molto sensibile, ma “cattura” molto rumore. Devo tuttavia fare qualche prova in più, stando magari attento agli apparecchi elettrici accesi nelle vicinanze e provando una messa a terra più seria. Internamente si possono attivare tre tipi di filtri: AC50Hz, EMG25Hz e DTF, ma per le poche prove che ho fatto credo che si ottengano risultati migliori acquisendo il dato senza filtri e poi pulendo il rumore con software specializzato sul PC.
Acquista le mappe per il Garmin eTrex 10
 Volete la mappa per le vostre escursioni sul Garmin eTrex 10? Pensate che non sia possibile perché Garmin dice testualmente che “non supporta alcuna cartografia aggiuntiva”? Pensate di dover comprare un nuovo e costoso modello? Non date retta a chi vi dice di cambiare GPS!
Il vostro vecchio Garmin va benissimo per caricare una mappa escursionistica che copre diverse centinaia di chilometri quadrati, ottima per escursioni a piedi o MTB! Ve la posso preparare con i dati aggiornati di OpenStreetMap e perfettamente ritagliata sulla zona che vi interessa, il tutto per pochi euro. La mappa che avrete sarà libera da copyright: potrete cioè copiarla quante volte volete e condividerla con i vostri amici, perché basata sui dati OpenStreetMap che sono liberamente disponibili.
Scrivetemi all'indirizzo niccolo@rigacci.org, potrete ricevere la vostra mappa personalizzata direttamente per email. Qui un volantino illustrativo.
