Table of Contents
Better photos from RAW files than from in-camera JPEGs
The mantra of professional photographers is: shoot in RAW, not JPEGs. With many cameras there is not such a dilemma: simply shoot in both RAW+JPEG and you have the best of both worlds. Actualy, due the increased capacity and low prices of SD cards, there are not excuses to set RAW+JPEG.
The actual problem is: are you able to post-process RAW files and get better photos than the ones directly produced in-camera by the on-board software and processor? Today post-processing softwares are rather complicated and you have to master such a quantity of parameters that you have to be really confident on your skills to go beyond automatic default factory processing.
You must to know that several basic processing are applied automatically to RAW images to get the actual JPEG photo. It depends upon the brand and model of the camera and lens, but in general you may expect:
- White balance
- Vignetting adjust
- Chromatic aberration compensation
- Lens distortion correction
- Noise filter
- Dead pixels interpolation
Modern cameras (both with fixed and interchangeable lenses) relay on data provided by the lens itself to make some of the above adjustments. E.g. a lens will embed into the RAW file the make and model of the lens itself, the f/stop value, the focal lenght, etc. The camera body may have a database of known lenses and automatically apply some corrections to JPEGs (e.g. de-vignetting and distortion correction).
When you use a RAW post-processing software you have to know if it is capable of doing the same basic processing, if it knows by default all the required parameters or if you have to provide e.g. lens characteristics, if such processing is automatically enabled or if you have to enable it manually.
In this article I will analyze what should be a RAW processing workflow using my Olympus E-M10 Mark II with some Olympus M.Zuiko lenses and some third party manual lenses, using the OM Workspace software and other software that you can run un GNU/Linux, like dcraw and RawTherapee.
OM Workspace
OM Workspace is a proprietary software available only for the Microsoft Windows operating system; it is downloadable for free from the Olympus support site. It is partially working in GNU/Linux using the Wine compatibility layer.
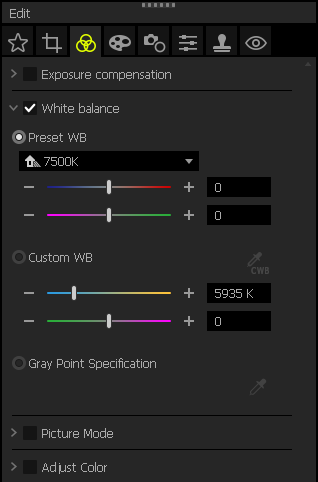 The program allows you to browse the filesystem showing a list of thumbnails, where you can click on the RAW file to edit. From the Window menu, select to Show Editing Palette. Into the Editing palette you can find the Basic tab, which contains most of the settings (effects) applied in-camera to the RAW image to obtain the in-camera JPEG.
It is possibile to enable the modification of each setting by ticking the check mark and editing the parameters. When the check mark is un-ticked, the RAW is developed with the settings used at the time of shooting. Be aware that this will not be exactly the same processing done in-camera by the TruePic VII processor, in fact OM Workspace will try to best mimic that development using its own software functions.
Once you are satisfied by the developing functions applied to the image, click on the image thumbnail itself so that the modification history is consolidated and permanently associated to the RAW file. The History panel is cleared but the developing options are saved.
My first test of RAW editing was limited to change the white balance on a photo taken with the Olympus M.Zuiko 14-40 mm Pancake lens. From the in-camera setting Auto (Keep Warm Color Off) I switched to Shadow 7500 K. Then I exported the picture using the menu Photos ⇒ Launch registered application which started IrfanView. To export into JPEG format just click on the File ⇒ Save as… menu. Into the JPEG save options dialog box set the save quality to 100% and enable to keep all the metadata (Exif, IPTC, XMP, etc.). This will produces a JPEG of size and quality similar to the Large Super Fine Olympus setting.
From a visual comparison it seems that all the in-camera developmente is reproduced by OM Workspace: noise reductoin, tonal adjustment, lens distortion correction, etc.
You just need to be aware that some of the metadata are not longer correct, e.g. the Exif.OlympusCs.WhiteBalance is still set to the original in-camera setting (Auto). You should actually look at the Exif.OlympusRd.EditStatus tag to know that the photo was RAW developed, in fact it reports the status Edited instead of Original.
Using the exiv2 tool you can inspect the Exif tags added by the RAW developlment performed by OM Workspace:
exiv2 -pa RAW_DEVELOPED.JPG | grep 'Exif.OlympusRd'
Exif.OlympusRd.EditStatus                    Long        1  Edited (Landscape)
Exif.OlympusRd2.WhiteBalance                 Short       1  (3)
Exif.OlympusRd2.WhiteBalanceValue            Short       1  7500
Exif.OlympusRd2.Saturation                   Short       1  0
Exif.OlympusRd2.SharpnessValue               SShort      3  0 -2 2
...
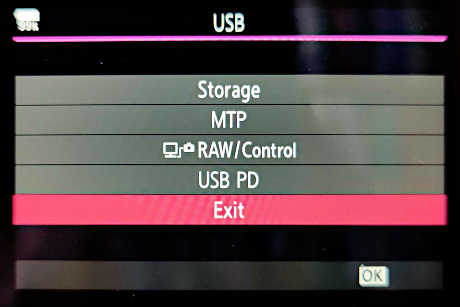 RAW development performed by OM Workspace is called PC RAW processing because it is performed by the PC. With some Olympus cameras it is possibile to perform the so called USB RAW processing, i.e. the processing is performed by the camera graphic processor (generally the Olympus TruePic) via the USB cable. The camera must be turned on and switched to the RAW/Control mode (see the picture of the USB menu on the right). Unfortunately the E-M10 is not capable of such mode.
RawTherapee
The program uses a clever procedure to open a RAW image for editing: it searches for the embedded thumbnail into the RAW file and it builds a tone curve on-the-fly to match the RAW data to the jpeg. This generally will assure that the program can open a RAW picture with no specific knowledge of the camera model. Thid default behaviur is controlled by the Preferences ⇒ Image Processing ⇒ Default Processing Profile ⇒ For raw photos: Auto-Matched Curve ISO Low.
For the Olympus E-M10 the thumbnail embedded into a RAW file is a JPEG file with a resolution of 3200 x 2400 pixels and about 1 Mb in size (you can extract if using the dcraw program).
How To
- Export cooked image file:
- Into the Editor apply the required cooking processes using the Toolbox tabs on the right side (Exposure, Detail, etc.)
- A checkmark icon appears over the thumbnail, this means that the image is processed (a sidecar
.pp3file is saved along the RAW image); click the Save current image icon below the edit screen.
- Restore RAW image to default state
- In the File Browser right-click the image and select Processing file operations ⇒ Clear.
- Otherwise, when the program is closed, you can delete the sidecar
.pp3file where RawTherapee saves the development procedure.
- Delete image files:
- From the File Browser click the Move to trash icon above the image thumbnail.
- Click the Show contents of trash icon on the filter toolbar.
- Click the Permanently delete all files in trash on the left of the thumbnails view.
The default cooking
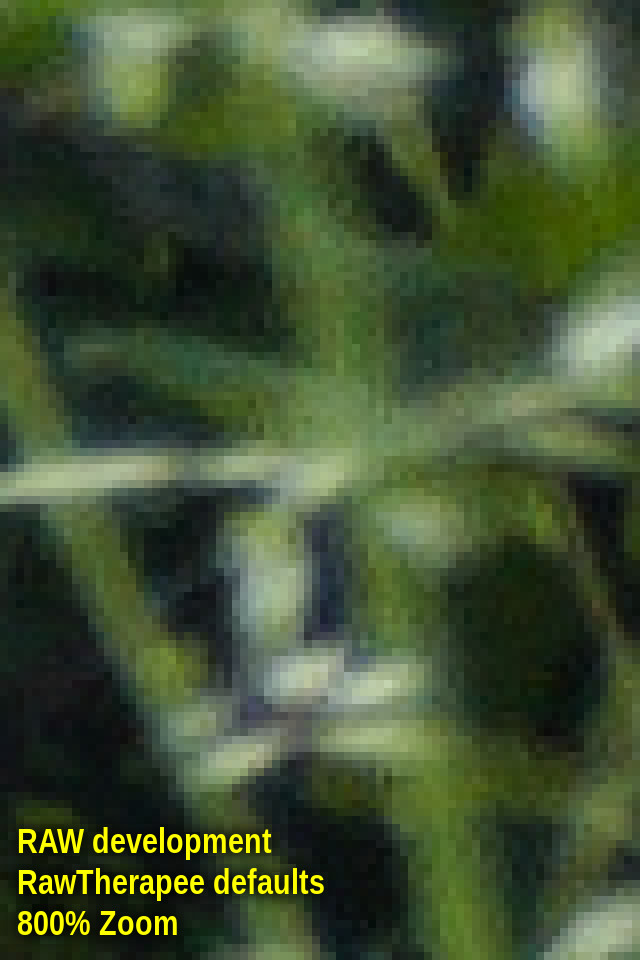
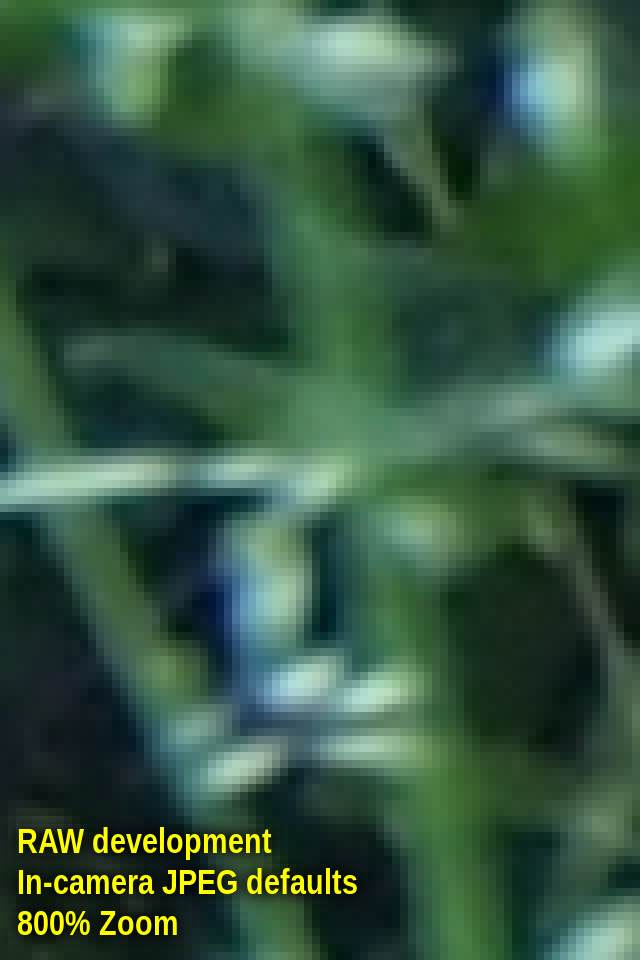
I made a simple test opening a RAW file and changing the white balance from the in-camera preset to shade, no other changes were applied to the image. The image is then saved with JPEG quality 98 and best quality subsampling. Here it is a 8x zoom detail, compared with the in-camera JPEG. As you can see the noise reduction applied in-camera is significantly higher than the one used by RawTherapee:
Darktable

dcraw
The dcraw tool is a de-facto standard among free and open source software to handle various RAW formats. The tool works only with RAW images produced by the supported cameras, which is remarkable achievement since - in general - specifications of the RAW formats are not publicly released by the manufacturers.
Let's use dcraw to identify a file and show metadata:
dcraw -i -v PC182449.ORF

Filename: PC182449.ORF
Timestamp: Sun Dec 18 15:14:30 2022
Camera: Olympus E-M10MarkII
ISO speed: 1000
Shutter: 1/160.0 sec
Aperture: f/0.0
Focal length: 0.0 mm
Embedded ICC profile: no
Number of raw images: 1
Thumb size:  3200 x 2400
Full size:   4640 x 3472
Image size:  4640 x 3472
Output size: 4640 x 3472
Raw colors: 3
Filter pattern: RG/GB
Daylight multipliers: 2.155587 0.934705 1.481107
Camera multipliers: 2.046875 1.000000 1.671875 0.000000
The full resolution JPEG created in-camera have a size of 4608 x 3456, while the RAW file is 4640 x 3472. If you did not selected the RAW+JPEG format, you can extract the PC182449.thumb.jpg thumbnail from the RAW file, which is not at full resolution, but it is useful e.g. for color reference:
dcraw -v -e PC182449.ORF
Extract almost RAW data
To extract a 16 bit TIFF image in sRGB colorspace you can use the followinf command (the file will be named PC182449.tiff, beware that most of the original metadata will not be included):
dcraw -v -6 -T -o 1 PC182449.ORF
The above command actually performs some of the expected RAW developing steps:
- Adjusts black and saturation points, white balance (but not using wb data stored by the camera into this picture) and rescales to the output 16-bit range. All of this processing can be disabled by the
-dthe option. - Perform demosaicing using the best algorithm for each camera model. Can be disabled by the
-Dthe option. - Automatically brighten the image. Can be disabled by the
-Wthe option. - Convert to sRGB color space.
Other highly recommended developing steps are not executed, like the following:
- White balance using camera data stored into the picture.
- Interpolate dead pixels.
- Apply some denoising algorythm (e.g. wavelets).
- Apply some RGB median filter to remove color artifacts.
- Lens distortion correction.
- Remove vignetting.
- Reduce chromatic aberration.
As far I know, dcraw is not able to perform lens distortion correction and vignetting reduction, for that purpose you can use other softwares like the GIMP or RawTherapee. The other processes are possible, some examples are shown in the following paragraphs.
White Balance
The dcraw tool shows the Camera multipliers, that are the coefficients calculated by the Olympus E-M10 Mark II to white balance this single photo. They are the gain factors for the red and the blue channels (in the above example 2.046875 and 1.671875 respectively) relative the green one (which multiplier is 1.000000). There are four numbers because digital sensors are generally build using a Bayer filter above a grid of 2 x 2 photosensors: one red, two green and one blue. The arrangement of the photosensors on the E-M10 is of type RGGB and the two green ones shares the same multiplier factor.
When the white balance is set to AUTO (or underwater), camera multipliers are calculated at shot time by the camera itself. When instead you choose one of the presets, they are almost fixed (actually they vary slightly, may be depending by the ISO setting). This is a reference table taken at ISO 200 (they were the same at ISO 800):
| WB Preset | Color temp. | R | G | B |
|---|---|---|---|---|
| Sunny | 5300 K | 1.914062 | 1.000000 | 1.789062 |
| Shadow | 7500 K | 2.218750 | 1.000000 | 1.414062 |
| Cloudy | 6000 K | 2.054688 | 1.000000 | 1.625000 |
| Incandescent | 3000 K | 1.195312 | 1.000000 | 3.289062 |
| Fluorescent | 4000 K | 1.914062 | 1.000000 | 2.593750 |
| Flash | 5500 K | 2.226562 | 1.000000 | 1.562500 |
If you use the -w option, dcraw will use the camera multipliers to do the white balance (this should results in almost the same results as the in-camera JPEG). Without the -w option, dcraw will use the Daylight multipliers shown, which are fixed for each supported camera model.
Several dcraw options together with the data contained into the RAW file may affect the white balance and color rendering in RAW development:
- Option -w or -r: use the camera white balance or a custom one (see camera multipliers and daylight multipliers above).
- Option -W: don't automatically brighten the image.
- Option +M/-M: use/don't use an embedded color matrix (it seems that the E-M10 does not embed any color matrix into the RAW files).
- Embedded ICC profile (it seems that the E-M10 does not embed any ICC profile into the RAW files).
So, a more advanced development (which includes camera's white balance) can be obtained with:
dcraw -v -6 -T -w -o 1 PC182449.ORF
Denoising
JPEGs produced in-camera generally have a denoising filter applied; on the E-M10 Mark II you can select different levels of noise filter (Custom Menu ⇒ E. Exp/Metering/ISO ⇒ Noise Filter): low, standard and high. RAW files are instead always saved without denoising, so you can choose what you want to apply during RAW developing. Using dcraw you can apply a wavelet denoising filter with a variable threshold. In this example a threshold of 200 is used, which is roughly equivalent to the Olympus standard setting:
dcraw -v -6 -T -w -o 1 -n 200 PC182449.ORF
You can use this purely indicative table as a starting point for your own experiments:
| Olympus noise filter | Dcraw wavelet denoising threshold (empirical estimate) |
|---|---|
| low | 50 |
| standard | 200 |
| high | 300 |
Chromatic aberration

ICC profile
The Olympus E-M10 Mark II camera does not embed any ICC profile into the RAW files; in fact using the option -p embed does not change in any way the developed file. You can create an external ICC file and use it, if you want.
dcraw and ImageMagick
Brightness and contrast
As seen above, dcraw is an effective solution to do some steps of the RAW development (demosaicing, noise reduction and white balance). To continue the RAW development in the GNU/Linux environment remaining to the command line, it is possible to use ImageMagick, the swiss knife of image editing.
An almost necessary step is to adjust brightness and contrast. Basically you have to convert the image produced by dcraw using a tonal curve which defines the ratio from input levels to output levels. For example, a curve that increases the contrast is a straight line with a slope greater than 45 degrees:
Clearly all the tones below a certain threshold will be transformed into black and all the tones above a certain threshold will be transformed into white. To keep it simple, the same transformation can be used for the three RGB channels; otherwise you can use three different curves for each channel.
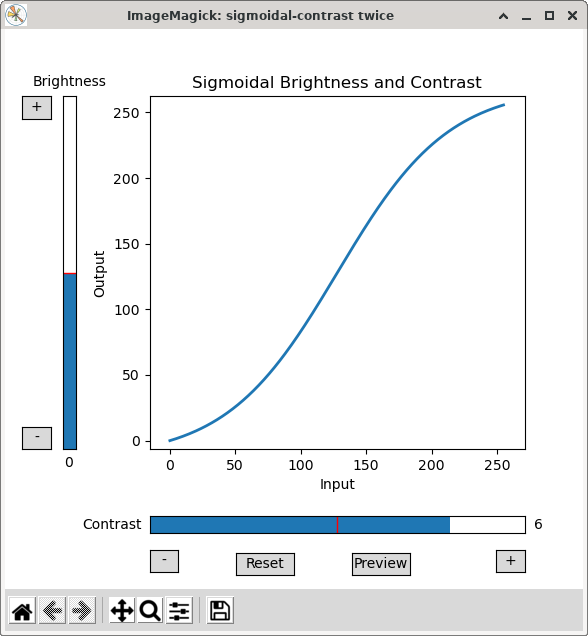
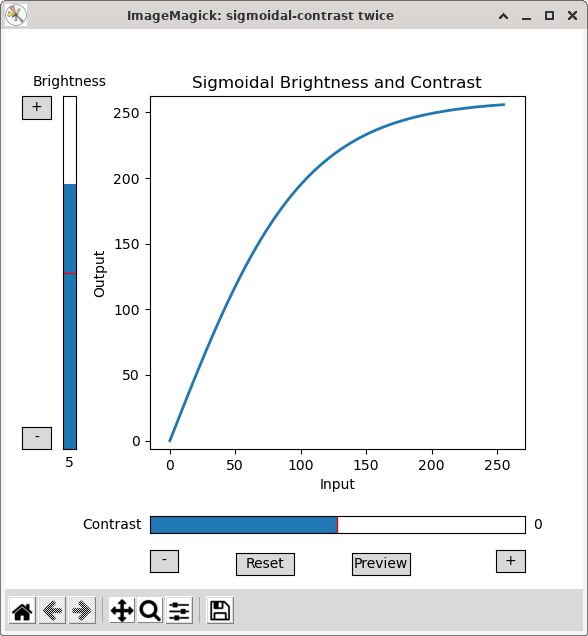
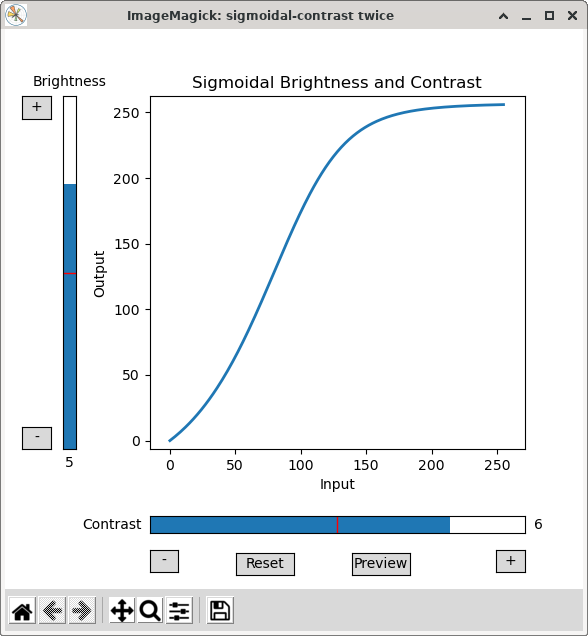
Instead of a straight line it is preferable to use a sigmoidal curve, which will avoid to saturate highlights or shadows. ImageMagick provides the convert tool witht the sigmoidal-contrast option. That function can be applied two times: the first time to adjust the contrast and the second time to adjust the brightness. The combined effect can be viewed in the following graphs:
The command line to get the above tonal correction is:
convert input.tiff -sigmoidal-contrast '6.00,50%' -sigmoidal-contrast '5.00,0%' output.tiff
The trick to obtain the brightness adjustment is to apply the sigmoidal-contrast using a mid-point of 0%, as suggested by the ImageMagick documentation and as implemented by the Fred's ImageMagick Sigmoidal Script.
The above graphs were created using a Python script that I use to quickly change brightness and contrast and to call the ImageMagick convert tool: sigmoidal-brightness-and-contrast-graph.py.
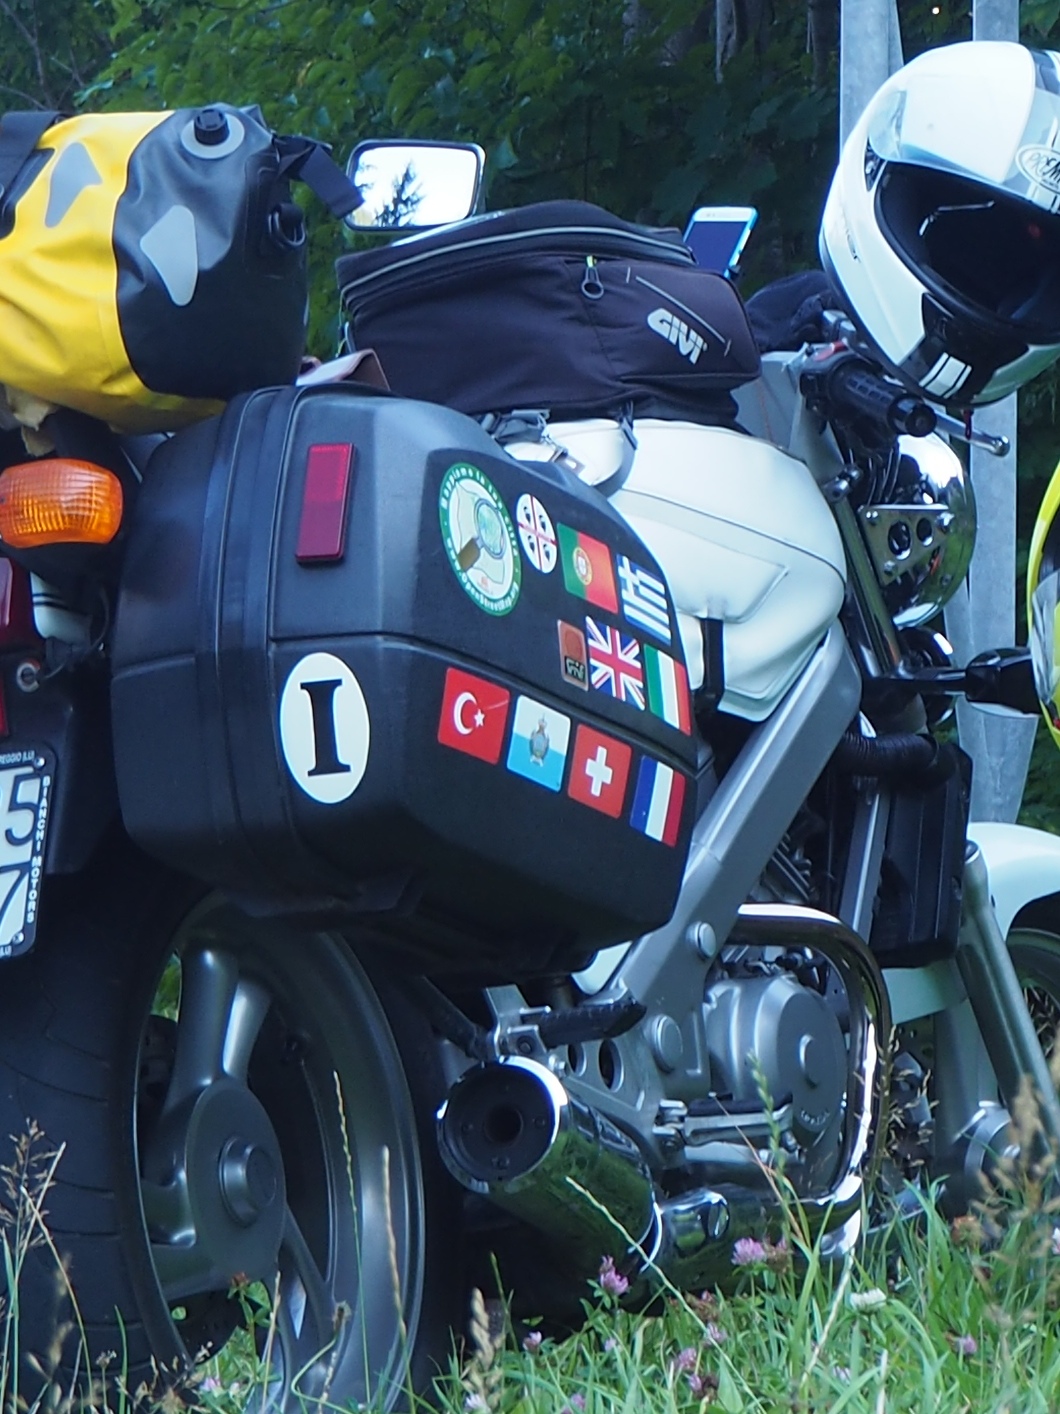
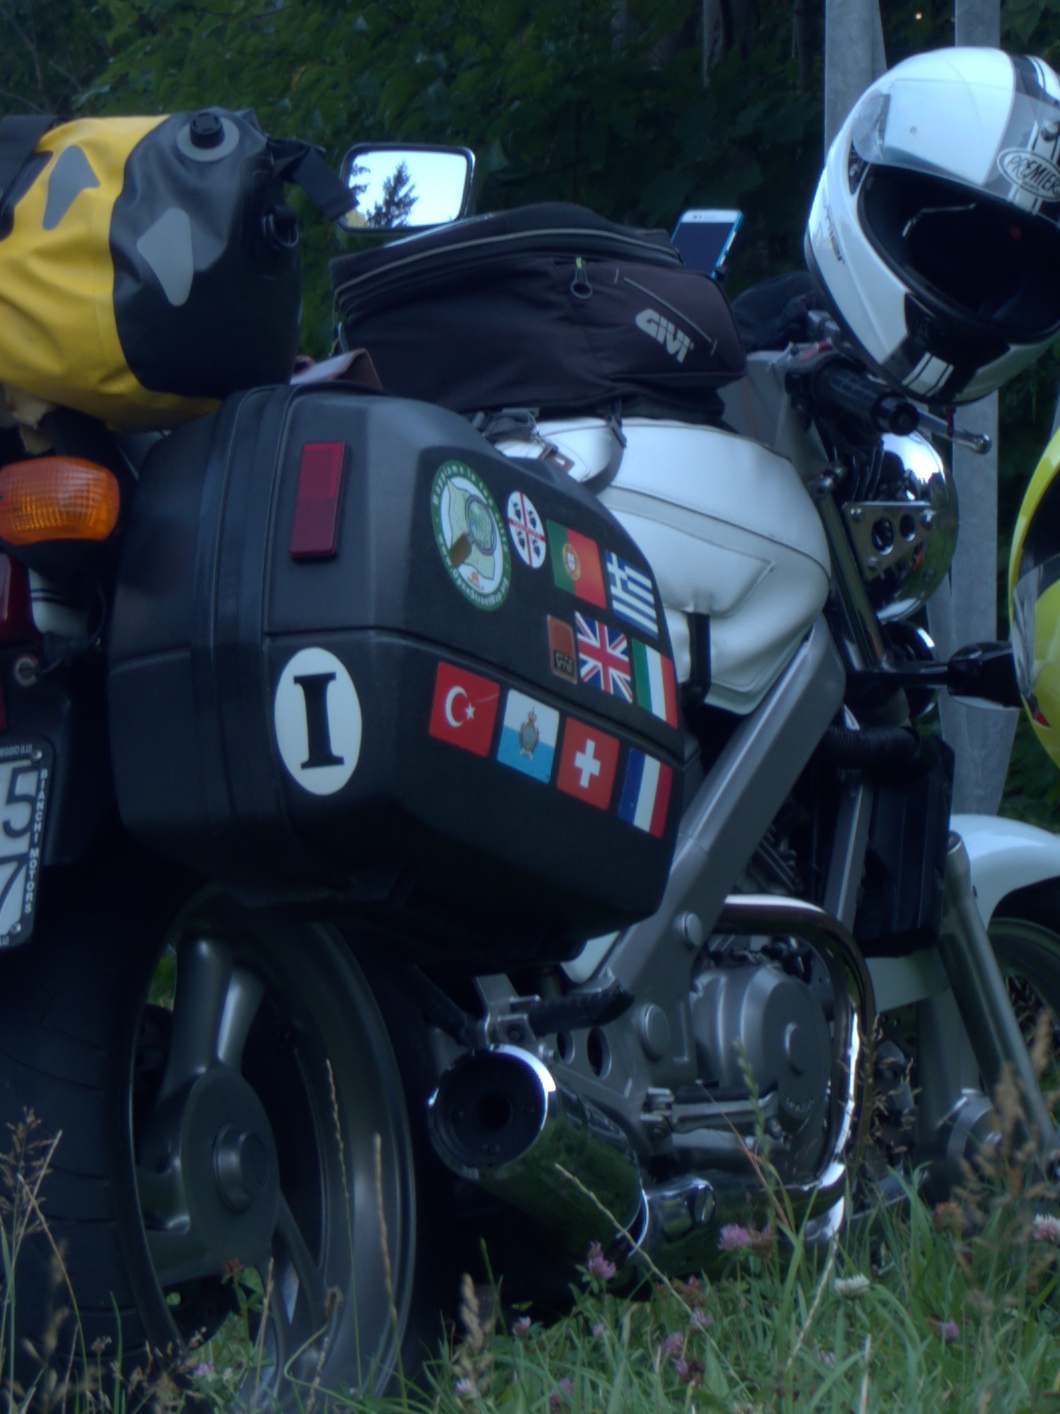
In the following three details you can see the in-camera JPEG, the RAW development with dcraw only and the tonal adjust with ImageMagick options. For this specific image I used the following options:
convert input.tiff -sigmoidal-contrast '4.20,50%' -sigmoidal-contrast '5.80,0%' \
    -quality '97' output.jpg
If you want to roughly compare the in-camera developed JPEG and the image produced by ImageMagick (concerning brightness and contrast), you can get the overall image statistics using the identify command provided by ImageMagick itself. Check for the mean and standard deviation values (where the value in parenthesis are normalized into the interval 0-1); a low mean value means a low brightness, a low standard deviation value means a low contrast:
identify -verbose image.jpg
...
  Image statistics:
    Overall:
      ...
      mean: 118.071 (0.463022)
      standard deviation: 79.4713 (0.311652)
      ...
Sharpening
The JPEG image produced in-camera looks much sharper than the one obtained from RAW development using dcraw and ImageMagick as explained above. If you zoom-in on areas that contain color contrast, you can see that an artificial contrast has been added with some specific algorithm.
It is possibile to add an option to the ImageMagick convert execution to add an adaptive-sharpen filter after the tonal correction. A value of 0x1.9 turned out to be visually very similar to the in-camera sharpening:
convert input.tiff \
    -sigmoidal-contrast '4.20,50%' -sigmoidal-contrast '5.80,0%' \
    -adaptive-sharpen '0x1.9' -quality '97' output.jpg
The following three enlargements show the sharpening of the in-camera JPEG, the RAW developed (dcraw + ImageMagick) with tonal adjust and no sharpening and the RAW developed with tonal adjust and sharpening:
Barrel distortion
JPEG images produced in-camera have generally the lens distortion corrected by the camera firmware, using data provided by the lens itself. ImageMagick is capable to apply a barrel distortion correction to an image, but it must to know three parameters which are closely related to the specific lens and to the focal length used (if the lens is a zoom with a variable focal length).
There are some free and open source documents about distortion parameters for lenses produced by well known makes, the main one is the Lensfun database. Unfortunately it does not contain data about my Olympus M.Zuiko 12-42 mm pancake lens, so I haven't been able to try the ImageMagick incantation.
It is possible to reverse engineer the barrel distortion applied by the camera body by comparing the RAW image and the in-camera JPEG. For a zoom lens you have to make several comparison at different focal lengths and calculate the distortion coefficients using a regression formula. See this article: Introduction to Lens Correction.
So - at the moment - I'm not able to apply lens distortion correction to RAW images using dcraw and other command line tools.
Vignetting
For the correction of vignetting effect, the same considerations made for the barrel distortion error apply. In-camera JPEGs are corrected by the camera firmware using specific data provided by the lens itself. ImageMagick is capable to apply the vignette filter, but you must to provide the correct parameters. Unfortunately the parameters are tied to the lens make and model, the focal length, the focal distance and the aperture in use!
Picture mode
JPEGs produced in-camera by the Olympus E-M10 Mark II are processed by the so called picture mode. You can choose among many presets named i-Enhance, Vivid, Natural, Muted, etc. Each preset consists of various settings in sharpness, contrast, saturation, etc. that are not present into the RAW image.
So, even if you want to mimic the Natural default picture mode of the Olympus, you have to create a batch of settings and apply them; this is true if you use dcraw to develop the RAW file and the GIMP to process the resulting image.
If you use instead OM Workspace, all the in-camera processing are simulated by the sofware starting from the RAW file, so the default export is as close as possible to the in-camera JPEG.
What you can get from the RAW developing using dcraw only is more similar to what Olympus calls the muted picture mode (regarding color saturation), but you need to apply a strong color curve using the GIMP to enhance brigthness and contrast to mimic the levels of the in-camera JPEG.
