Table of Contents
Rooting the ZTE Blade A610 Android Phone
![]()
![]()
![]()
![]()
![]()
 I purchased this phone in January 2020 for 57 euros, I think that it has a pretty good hardware: 2 GB RAM, 16 Gb Flash, 720×1280 screen, LTE, 4000 mAh battery. The only drawback is the operating system, the last release is Android 6.0 Marshmallow, with security patch 2018-08-05. The phone can be easly rooted, unfortunately there is not an official LineageOS build, or other famous custom ROMs.
One week after I purchased that phone from Amazon, the price suddenly rose to about 130 euros! I think that at this price the phone is not longer an interesting bargain, because in that price range you can find devices with 3 Gb of RAM and a more recent Android version.
Quick Facts
| | Good quality/price ratio (at 57 €). 2 Gb RAM. 16 Gb Flash. 4000 mAh Battery. 720×1280 5“ display. Easy rooting. |
| | Outdated Android 6.0. Non replaceable battery. |
Here some specification:
| Launch date | August 2016 |
|---|---|
| Android | 6.0 Marshmallow |
| Processor | MediaTek MT6735 |
| CPU | Quad-core 1.3 GHz Cortex-A53 |
| RAM | 2 Gb |
| Storage capacity | 16 Gb |
| Screen | 720x1280px 5.0 inches, IPS LCD capacitive touchscreen |
| Rear Camera resolution | 8 Mpx |
| Telephony | GSM/HSPA/LTE, Dual SIM |
This is the operating system out-of-the-box:
| Android version | 6.0 |
|---|---|
| Android security patch level | August 5, 2016 |
| Baseband version | MOLY.LR9.W1444.MD.LWTG.MP.V79.P31 2016/08/25 15:13 |
| Kernel version | 3.18.19+ zte-kernel@droid #1 Wed Nov 9 14:27:43 CST 2016 |
| Build number | CH_EUR_BA610TV1.0 |
| Hardware version | WXQMA1B1-2 |
Afer an OTA Update I got this:
| Android version | 6.0 |
|---|---|
| Android security patch level | August 5, 2018 |
| Baseband version | MOLY.LR9.W1444.MD.LWTG.MP.V79.P47 2018/10/23 19:40 |
| Kernel version | 3.18.19+ zte-kernel@droid #1 Thu Feb 21 15:45:59 CST 2019 |
| Build number | CH_EUR_BA610TV1.4 |
It is also possibile to download the update.zip from the ZTE Support Site. The update is labeled 365012B1468CH_EUR_BA610TV1.4, dated 2019-04-04 and sized 1.30 Gb. With the ZIP file you can try two update procedures; the first one is from Settings ⇒ About phone ⇒ System updates ⇒ Storage card updates. The alternative procedure, called forced upgrade, is started from the Recovery mode. Read the ZTE Upgrade Guide for instructions.
How to enter the stock Recovery
 Power-off the device, then power-on using VolumeUp + Power. You will enter the Boot mode select menu, choose Recovery (using VolumeUp to choose and VolumeDown to confirm). You will be presented with a Broken droid image; press again VolumeUp + Power (sometimes it is required to keep them pressed for about 10 seconds) to enter the Recovery menu.
Rooting
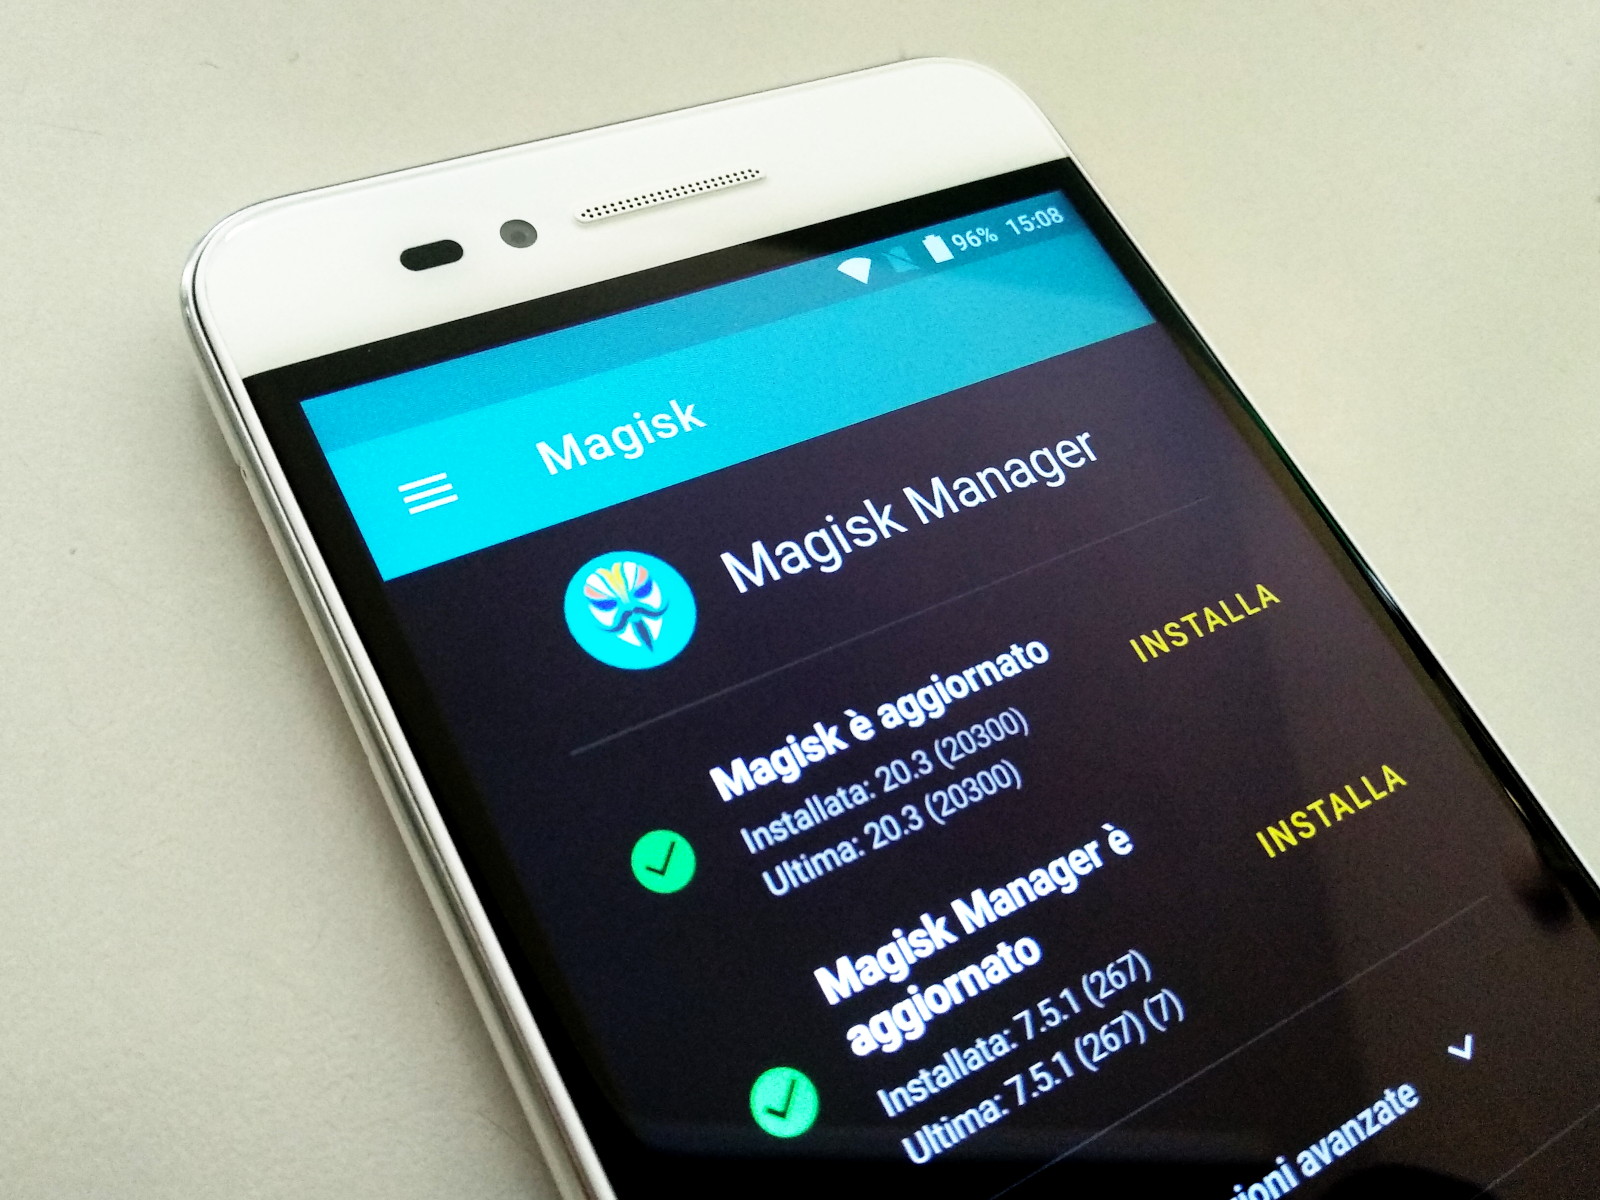
To enable root privileges on this phone we used Magisk, which has all what is needed to install and manage root privileges and to disable dm-verity.
Booting modes
Generally every rooting recipe requires to operate the phone in special modes, i.e. not the default running operating system. You should be familar with these modes and how to activate them. Some of these mode are specific of devices based on the MTK MediaTek chips.
| Standard system | Just power-on the device and wait: you will enter the default Android system. When the phone in in standard mode, you can use the adb command line tool to perfome some operations from a PC connected via the USB cable. |
|---|---|
| Fastboot | This is a special mode where you can interact from a PC connected via the USB cable, using the fastboot command line tool. To enter the fastboot mode: power-off the device, then press the VolumeUp and Power keys simultaneusly, you will see a simple menu on the screen: select Fastboot using the VolumeUp key and confirm with VolumeDown. To enter the fastboot mode, the phone requires at least a working preloader partition. In fastboot mode you can e.g. flash the content of a partition. |
| Recovery | To enter the recovery mode power-off the device, start with VolumeUp+Power to activate the boot mode select, and choose Recovery. You can also use the adb reboot recovery via the USB cable. Android provides a default Recovery program (installed into the recovery partition), which enables you to perform some basic operations, like whiping the Dalvik cache (to solve some software issues), or doing a factory reset. It is possibile to replace the stock recovery with a custom one. TWRP is a well-known replacement, which allow you, among other things, to install software before the O.S. is booted. To run a recovery program you need a correctly installed preloader and recovery partition. |
| Meta mode | Smartphones based on the MTK chipset, enter a special and very basic mode called meta mode when they are powered-off, but connected to a PC using the USB cable. This mode does not require the preloader, but can be used to flash any partition, e.g. using the SP Flash Tool program. This is the only way to recover a bricked phone, i.e. a phone which has a faulty preloader or boot or system image. |
Required files
- The scatter file - It is required for flashing (upload) system partitions to the phone, the numbers contained in this file are required also to backup (readback) system partitions from the phone to the PC. See this page for more insight: Android Partitions on MTK Devices. The MT6735_Scatter_ZTE_BLADE_A610_WXQMA1B1-2.txt file is included whit the TWRP download below.
- The TWRP Recovery - There is no offical TWRP build for the ZTE Blade A610, but fortunately I found a TWRP v3.2.3 compiled by the user kiruha_21 which works well on my phone (touch screen included!). Someone says that is based on the kernel DIS_ASI_P635T36V1.0.0B18 / Sun Oct 30 10:48:15 CST 2016 (Russia), but who knows! You can find the original link in this xda-developers.com post.
- Magisk-v20.3.zip and MagiskManager-v7.5.1.apk - The archives are distributed by the author, on GitHub.
- SP Flash Tool - Technically it is not required to install TWRP and to root the phone, but it is useful to make a backup of flash partitions before attempting the rooting operation. I used version 5.1916 for GNU/Linux.
Backup
You should backup at least three partition, you need to restore them in case you will want to install an OTA Update.
- boot.img
- recovery.img
- system.img
You can use SP Flash Tool to execute the backup.
Install TWRP recovery and Magisk root
Beware that the ZTE Blade A610 has the dm-verity protection active (at least with Android v6.0, security patch level: August 5, 2016). This means that any change to the system partition will be detected by the kernel at bootstrap, causing a freeze (boot does not complete). This can be a problem, because to have the TWRP recovery permanently installed and to install su (the root privileges binary), we need to change the /system partition.
If you do not disable dm-verity you will discover that the installation of TWRP into the recovery partition is not permanent. Once you boot in normal system, the recovery partition is modified (may be reverted to the stock recovery, or with something not functional). Infact to let TWRP stay permanent into its partition, is required to rename the file /system/recovery-from-boot.p into /system/recovery-from-boot.bak; this is performed automatically when you run TWRP for the first time if you Swipe to Allow Modifications. The required trick is to install Magisk.zip the very first time you run TWRP; the Magisk installer disables dm-verity.
If you don't install Magisk when you run TWRP and you allow system modifications, you will brick your phone (unable to boot). You will need to restore the whole system.bin from a backup. If you already installed TWRP without allowing system modification, you can change that permission selecting the Mount button and unchecking Mount system partition read-only: you are asked again to Swipe to Allow Modifications.
- Enable Developer options, OEM unlocking and USB debugging.
- Optional step: restart in fastboot mode, execute fastboot oem unlock and reboot (this will do a factory reset).
- Copy Magisk-v20.3.zip and MagiskManager-v7.5.1.apk to /sdcard.
- If you did the optional step #2, restart in fastboot mode and execute fastboot flash recovery twrp-recovery.img. Otherwise you need to flash the TWRP Recovery using SP Flash Tool.
- Boot in TWRP recovery, allow modification, install Magisk-v20.3.zip.
- Wipe Dalvik cache and reboot.
- Install MagiskManager-v7.5.1.apk.
Here some more details.
Developer options
To enable Developer options use the standard procedure: go to Settings ⇒ About phone ⇒ Tap 7 times on Build number. Now you have Settings ⇒ Developer options. Inside Developer options enable OEM unlocking and USB debugging.
OEM unlock
It turned out that performing this step is not strictly required: if you flash the TWRP Recovery using the SP Flash Tool graphical software, you don't need to issue the fastboot oem unlock command and so no factory reset is performed.
Otherwise, if you wan use only the command line, now you have to actually unlock the bootloader. Once unlocked, you can boot the phone from a custom operating system image (we will use TWRP because it can install Magisk). Beware that OEM unlocking implies a factory reset: you will loose any app and any customization you made on the phone.
Start the phone in fastboot mode and execute the following command from the attached PC:
fastboot oem unlock
You will be warned on the phone that a factory reset will occurr, you must confirm. Now you can reboot in normal system issuing the command:
fasboot reboot
Copy Magisk on the phone
In normal system use the adb tool from the connected PC to copy files on the phone and return to fastboot mode:
abd push Magisk-v20.3.zip /sdcard
adb push MagiskManager-v7.5.1.apk /sdcard
abd reboot bootloader
Install TWRP and Magisk
This is the most delicate part. You have to flash the TWRP recovery and start it. From the attacched PC execute:
fastboot flash recovery twrp-3.2.3-zte-blade-a610-recovery.img
Power-off the device, restart with VolumeUp+Power and start TWRP recovery. Now you have to Swipe to Allow Modifications, navigate in the Install menu and choose to install the ZIP archive Magisk-v20.3.zip. To be safe, perform also a wipe of the Dalvik Cache.
Once rebooted in normal system, you can install the Magisk APK and confirm that su (superuser command line program) is properly working.
OTA Updates
Once rooted, the On-The-Air updates will fail because almost certainly a new kernel with dm-verity enabled is insalled. This will detect the modifications to the system partition, freezing the bootstrap at the ZTE logo. Your chance is to perform a restore once notified that an update is available. Restore the boot.bin, recovery.bin and system.bin images from the backup before root. After the update is installed, you have to reinstall TWRP and Magisk.
Removing Useless Apps
This device includes by default some useless apps, following the bad habit very much in vogue in these days. Some can be removed simply by uninstalling them, others require root privileges to be removed.
| AccuWeather | Can be uninstalled by the user, but some files remains. See below. |
|---|---|
| Clean Master | Can be uninstalled by the user, but some files remains. See below. |
| Can be uninstalled by the user, but some files remains. See below. | |
| Can be uninstalled by the user, but some files remains. See below. | |
| WPS Office | Can be uninstalled by the user, but some files remains. See below. |
| ZTE Cares | Self-diagnostic app. It includes some tests to check the functionality of the device: touch screen, speaker, microphone, LCD panel, etc. It would be useful, but it warns about collecting many data about you and your phone. It is contained into /system/priv-app/ZTE_Cares/. |
| MiFavor Desktop | This is the default launcher of the ZTE Blade A610 phone. The first time you run it, it requires too much permissions, so I installed an alternative launcher: the Rootless Pixel Launcher. Then I removed the directory /system/priv-app/MiFavor_Desktop/. |
| UME Browser | Surfing the internet is too much serious thing, so please install a serious browser (e.g. Chrome or Firefox). Then delete the /system/priv-app/Ume_Browser/ directory. |
| Hangouts | How many messaging, video-chatting, etc. apps do you need on your phone? I don't want this one from Google. so I removed also /system/app/Hangouts/. |
| SwiftKey Keyboard | If you can live without knowing how many meteres you swiped on the keyboard and what are the more pressed keys, you can uninstall this app and the relative configurator: /system/priv-app/Swiftkey_Keyboard/ and /system/priv-app/SwiftKeyFactorySettings/. Stay with the Android AOSP Keyboard or install one of your choice. |
| Family mode | This is an alternative launcher that can be choosen for elderly people or children. It is not so bad, but it is missing some basic features. E.g. you can add shortcuts to app and contacts, but not to activities, like the torch. There is not an S.O.S. button or alike. The path of the program is /system/priv-app/Family_mode/. If you remove Family Mode, you can also safely remove the associated service /system/priv-app/MiEasyModeAPIService/. |
This is an example on how to remove a system application, via adb. Boot the phone in normal system, connect the USB cable and execute adb shell on the connected PC, then:
su
mount -o remount,rw /system
rm -r /system/priv-app/ZTE_Cares/
reboot
Remove also directories under /system/vendor/operator/app/, /data/app-lib/ and /data/data/:
rm -r /system/vendor/operator/app/AccuWeather
rm -r /system/vendor/operator/app/Clean_Master
rm -r /system/vendor/operator/app/Facebook
rm -r /system/vendor/operator/app/WPS_Office

rm -r /data/app-lib/AccuWeather
rm -r /data/app-lib/Baidu_Location
rm -r /data/app-lib/Clean_Master
rm -r /data/app-lib/Facebook
rm -r /data/app-lib/Twitter
rm -r /data/app-lib/WPS_Office

rm -r /data/data/cn.wps.moffice_eng
rm -r /data/data/com.accuweather.android
rm -r /data/data/com.cleanmaster.mguard
rm -r /data/data/com.facebook.katana

/system/vendor/operator/app/HimaxMPAP
/data/app-lib/HimaxMPAP
/data/data/com.himax.mpap
Installing the MS-Windows ADB Drivers
To install the Windows ADB drivers (you can download the official drivers from this page on developer.android.com), you must add the USB identifiers of this ZTE device into the android_winusb.inf file. First of all you can use lsusb on a GNU/Linux box to know the vendor and product IDs (VID and PID):
Bus 002 Device 013: ID 19d2:0306 ZTE WCDMA Technologies MSM
Then you have to add these lines into the file android_winusb.inf, after the listed Google devices:
;ZTE Blade A610
%SingleAdbInterface%        = USB_Install, USB\VID_19D2&PID_0306
%CompositeAdbInterface%     = USB_Install, USB\VID_19D2&PID_0306&MI_00
%SingleAdbInterface%        = USB_Install, USB\VID_19D2&PID_0306
%CompositeAdbInterface%     = USB_Install, USB\VID_19D2&PID_0306&MI_01
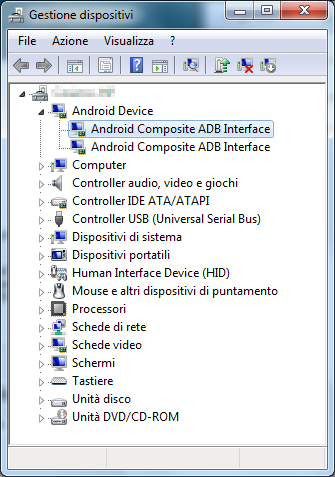
Now you can open the Windows Device Manager, right-click on the not-recognized device and update the drivers, searching then from the disk. Once properly installed, the device is listed as Android Composite ADB Interface:
Obsolete MTK Droid Tools
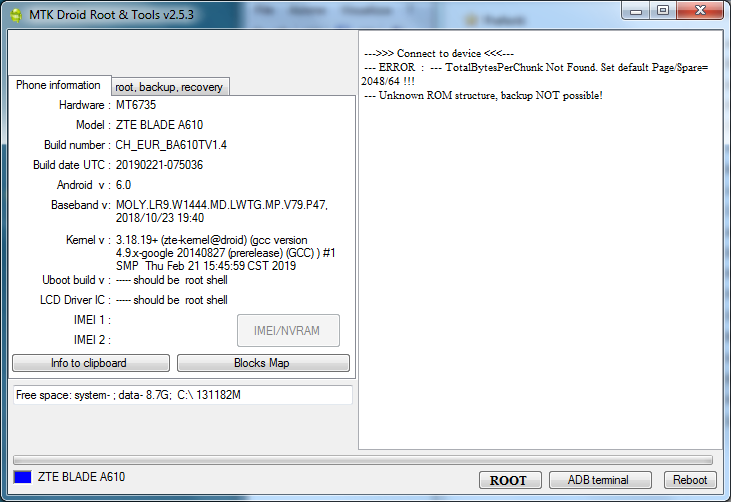
Despite the ADB drivers are correctly installed, the MTK Droid Tools does not work because the smartphone runs Android 6.0. The error message is: Unknown ROM structure, backup NOT possibile!


