Table of Contents
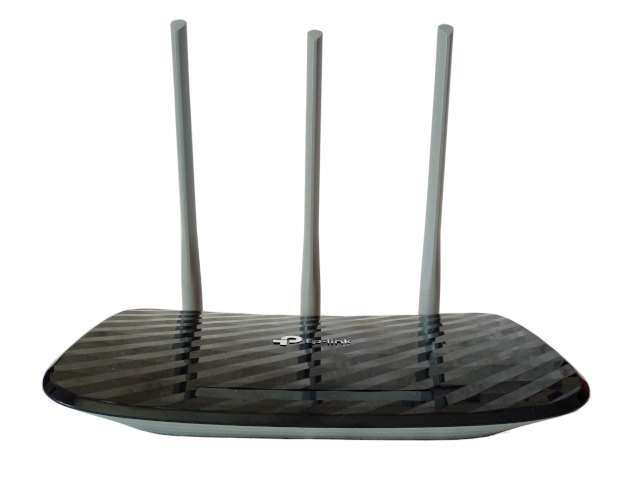
OpenWrt on Router TP-Link AC750 Archer C20 v5
Purchased on February 2021 for about 23 Euros because I needed a router with both 2.4 and 5 GHz WiFi.
It seems that the stock firmware (version 0.9.1 4.16) is practically unusable; while ping times seem OK, loading an average web page with many images on it, get stuck in the middle, with several non-loaded pieces (images, JavaScript, ect.), causing a disaster web experience. The old TL-WR741ND with half the RAM, outperforms this new one by far!
| Hardware Version | Archer C20 v5 00000005 |
|---|---|
| CPU | MediaTek MT7628NN, 580 MHz |
| RAM | 64 Mb |
| Flash | 8 Mb |
| Ethernet LAN ports | 5 x 100M |
| Ethernet WAN ports | 1 x 100M |
| WLAN 2.4GHz | b/g/n |
| WLAN 5.0GHz | a/n/ac |
| Default IP Address | 192.168.0.1 |
| Default login/password | admin/admin |
| Stock TP-Link firmware | 0.9.1 4.16 |
| OpenWrt version tested | 19.07.6, r11278-8055e38794 |
NOTICE: It seems that the problem of poor web performances is solved with the original TP-Link firmware 0.9.1 4.17; I downloaded that version from the TP-Link site and flashed it above OpenWrt following the procedure explained below.
However the winning choice for me is to install OpenWrt on it. Fortunately enough OpenWrt v.19.07.6 was compiled for this device and it works quite well, supporting dual band WiFi.
Installing OpenWrt via TFTP
 This is the step-by-step procedure that I followed, using my Debian GNU/Linux PC as my workstation.
- Download the OpenWrt 19.07.6 image compiled by Linaro1985, from his GitHub page (here a local copy: TPLinkArcherC20V5.zip).
- Install the tftpd Debian package.
- In /etc/inetd.conf, verify that the document root for the server is /srv/tftp/.
- Extract the tp_recovery.bin file from the Linaro's archive into /srv/tftp/, mode 644.
- Configure the Ethernet interface of the PC with address 192.168.0.66/255.255.255.0.
- Restart: “systemctl restart inetd.service”
- Connect one LAN port of the TP-Link to the same network of the PC and power-on the router while keeping the reset button pressed with a toothpick.
An TFTP client on the router will start automatically in about 7 seconds, when the TFTP request is started, you can release the reset button. Check /var/log/syslog for tftpd activity (notice the filename requested).
Feb 17 15:55:57 ithaca tftpd[21039]: tftpd: trying to get file: tp_recovery.bin
Feb 17 15:55:57 ithaca tftpd[21039]: tftpd: serving file from /srv/tftp
You can sniff the TFTP traffic usgin tcpdump:
tcpdump -i eth0 -n 'host 192.168.0.66'
14:19:23.541952 IP 192.168.0.2.2387 > 192.168.0.66.69:  34 RRQ "tp_recovery.bin" octet timeout 1
14:19:23.615613 IP 192.168.0.66.40958 > 192.168.0.2.2387: UDP, length 516
14:19:23.615958 IP 192.168.0.2.2387 > 192.168.0.66.40958: UDP, length 4
...
The power LED will start blinking, after 2 minutes the blink stops.
The first thing to do is to set a password from System ⇒ Administration ⇒ Router Password, the OpenWrt LuCI Web Interface is accessible at:
| Default IP Address | http://192.168.1.1/ |
|---|---|
| Default login/password | root/blank (none) |
SSH access is obviously enabled:
BusyBox v1.30.1 () built-in shell (ash)

  _______                     ________        __
 |       |.-----.-----.-----.|  |  |  |.----.|  |_
 |   -   ||  _  |  -__|     ||  |  |  ||   _||   _|
 |_______||   __|_____|__|__||________||__|  |____|
          |__| W I R E L E S S   F R E E D O M
 -----------------------------------------------------
 OpenWrt 19.07.6, r11278-8055e38794
 -----------------------------------------------------
Reverting to the official TP-Link firmware
Once you have installed OpenWrt on the router, It seems that there are four methods to revert to an official TP-Link firmare:
- The TFTP procedure.
- The OpenWrt web interface.
- From the OpenWrt ssh command line, using
mtd. - The emergency web boot interface.
From the TP-Link site you can download an updated firwmare, e.g. the 0.9.1 4.17 version (here a local copy: Archer_C20v5_EU_0.9.1_4.17).
The official images are intended to be uploaded into the router via the official TP-Link firmware web interface only, but we have OpenWrt now, so it is not an option!
The TFTP procedure
Is the official firmware suitable to be flashed via TFTP? For some models it seems possible (see the link below about the TL-WR1043ND model), but in my case it failed. After the TFTP procedure finished, the router did not reboot properly and it become bricked. Fortunately enough, it seems that the bootloader in this model is safe even against bad flashes (does it have a safe dual boot?), so it was possible to repeat the OpenWrt TFTP flash procedure.
The reasons why this procedure failed is unclear. Something to investigate: the OpenWrt image seems to contain two U-Boot bootloaders, one block of LZMA compressed data and a Squashfs filesystem. The official firmware has only one U-Boot.
Flashing in OpenWrt
The second and third methods (OpenWrt web interface or ssh with mtd) requires a stripped version of the firmare. Information about this is scarce, many people share stripped images without sharing the recipe to obtain them (shame on them!). Common tradition says that you should remove the boot loader from the begin of the image, but it is not clear to me if some sort of header should be added anyway.
I did not tried this procedure due lack of information. I just learned about the binwalk tool (installed with the same name Debian package), which is able to guess the content of a firmware image; here it is an example run against the official 0.9.1 4.17 EU image:
binwalk "Archer_C20v5_EU_0.9.1_4.17_up_boot[201214-rel42010].bin"

DECIMAL       HEXADECIMAL     DESCRIPTION
--------------------------------------------------------------------------------
81136         0x13CF0         U-Boot version string, "U-Boot 1.1.3
                              (Dec 14 2020 - 11:30:16)"
132096        0x20400         LZMA compressed data, properties: 0x5D,
                              dictionary size: 8388608 bytes,
                              uncompressed size: 3642448 bytes
1442304       0x160200        Squashfs filesystem, little endian, version 4.0,
                              compression:xz, size: 5379920 bytes, 793 inodes,
                              blocksize: 131072 bytes, created:
                              2021-01-04 07:28:29
If you want an image with the bootloader stripped, you have to remove the first 132096 bytes (which is the offset of the following LZMA block). Here it is the command line to strip 258 x 512 = 132096 bytes:
dd if="Archer_C20v5_EU_0.9.1_4.17_up_boot[201214-rel42010].bin" \
    of="Archer_C20v5_EU_0.9.1_4.17_201214-rel42010_stripped.bin" skip=258 bs=512
Generally speaking, if an image file has a name containing the boot word, it contains the bootloader coode.
On the other hand, writing an image from the ssh command line requires you to know also the name of the partition, it should be something like:
mtd -r write /tmp/original_firmware.bin <partition_name>
The emergency web boot firmare upload
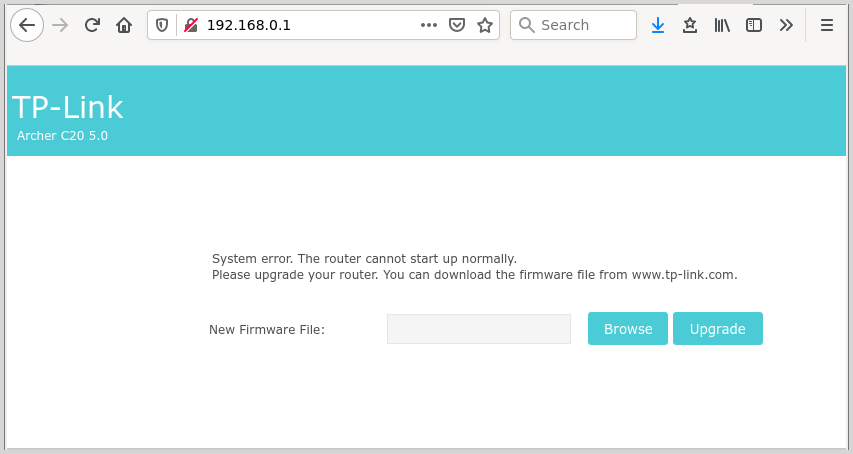
I gave up trying the previous methods once I discovered a nice feature of this router: it has an emergency web firmware upload mode which should start automatically if a flashing procedure fails. To force that mode to start, it is sufficient to write 4 bytes at the begin of the /dev/mtdblock8 partition. I wish to thank user dxdt which found this trick haking the boot procedure and was so kind to share his finding.
So, once installed OpenWrt and accessed the command line via ssh, write the magic 4 bytes:
printf \\xef\\xcd\\xab\\x89 > /dev/mtdblock8
Now you can power-cycle the router and wait that it will come back serving a web page at the address http://192.168.0.1/. Here you can upload the original stock TP-Link firmware.
Installing additional software
Once OpenWrt 19.07.6 is installed, this is the free space on the flash memory:
Filesystem                Size      Used Available Use% Mounted on
/dev/root                 3.0M      3.0M         0 100% /rom
/dev/mtdblock5            3.0M    296.0K      2.7M  10% /overlay
overlayfs:/overlay        3.0M    296.0K      2.7M  10% /
We installed the following packages:
| Package name | Space required |
|---|---|
| openvpn-openssl | 1.3 Mb |
| tcpdump-mini | 204 kb |
| coreutils-base64 | 19 kb |
| etherwake | 24 kb |
| diffutils | 108 kb |
| libustream-openssl20150806 | 12 kb |
| ca-bundle | 140 kb |
With older versions of OpenWrt (e.g. version 14.07 Barrier Breaker) we used openvpn-polarssl, which was a version of OpenVPN with SSL support provided by libpolarssl, a lightweigth SSL library. That version seems not longer available, so we opted for openvpn-openssl which depends on the full libopenssl1.1. This has the advantage that we can install the libustream-openssl* and the ca-bundle packages and have e.g. the wget able to open https URLs.
We preferred etherwake instaead of wakeonlan because the latter depends on perl which is a large package and the free space is not sufficient.
Downloads
- TPLinkArcherC20V5.zip - OpenWrt 19.07.6 for the TP-Link Archer C20 v5 by user Linaro1985.
- Archer_C20v5_EU_0.9.1_4.17.zip - Official TP-Link firmware for the TP-Link Archer C20 v5 EU.

